

Back to the Classics: How to tie Lefty’s Classic Deceiver pattern with mangrove baitfish colors. There and 1,000’s of saltwater patterns, new ones created every day, but sometimes you just need to stick with what works
By Drew Chicone
[dropcap]W[/dropcap]hile working on my upcoming book Feather Brain, I was lucky enough to interview a dozen or so, amazingly talented fly designers. Interviewing such an impressive collection of fly tying innovators was not only an unforgettable pleasure, but very enlightening as well. Each tyer was more than willing to talk about their historically productive patterns and graciously shared their insight and theories on pattern development. The shortest of all the interviews, if you can even call it that, was with Capt. Steve Baily. For those of you that don’t know him, Steve is one of the most impressive fly tiers any of us will ever come across.
His articles have been published in countless publications, he has appeared on numbers TV shows, and he has fished and tied with the legends of the sport, yet he keeps to himself and is extremely humble. When I asked Capt. Baily about developing his own patterns, he simply said, “I don’t… I stick with what works, and that’s a Deceiver and Seaducer, and I don’t fish too many color variations either.” That was it!
The brief conversation stuck in my head, and got me thinking. Maybe it’s time to revisit some of the classic patterns. I went through my drawer of bucktails and feathers and started tinkering with different colors variations. My goal was to come up with a Deceiver that was “a dead ringer” for those little barred baitfish that dart in and out of the mangrove roots, leaving behind only a glint of gold for a split second.
I had forgotten just how beautiful this pattern looks and moves in the water.
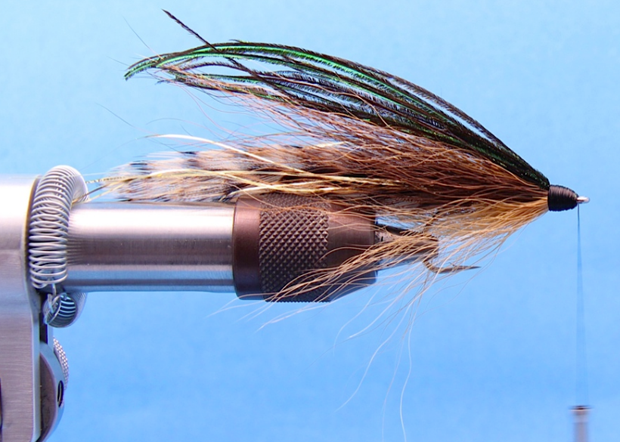
Mangrove Deciever
Materials Hook: #2 Diachi 2546 or Similar Saltwater Hook
Thread: Lagartun X Strong 150 Denier
Black Tail: Stained Grizzly Hackles & Gold Flash-a-bou
Body: Ginger & Brown Bucktail
Wing: Peacock Herl
Adhesive: Clear Cure Goo Hydro
INSTRUCTIONS
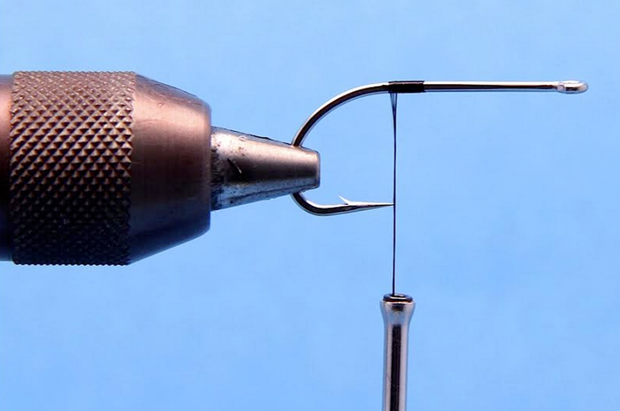
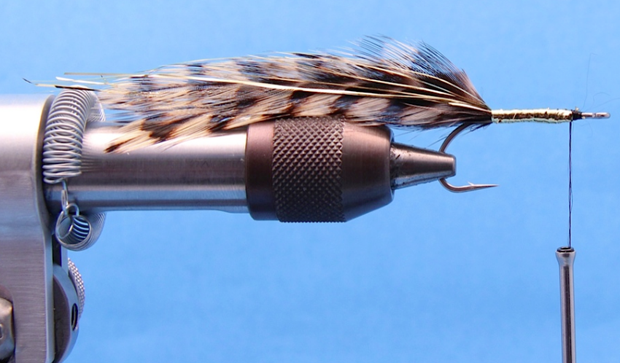
Step 1:
Start the thread slightly in front of the hook point, and secure with 8-10 wraps.
Step 2:
Marry two pairs of matched grizzly saddle hackles (4 feathers total, two on each side) and secure them so that the tips of the feathers extend 3 inches past the bend of the hook. Marrying the hackles” refers to placing the concave or undersides of the feathers together. Another common term for this technique is “praying hands.” When wet, all the feathers come together and look as one.
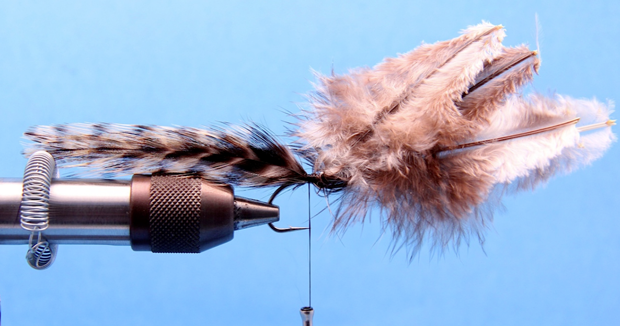
Step 3:
Build up the body of the fly by wrapping over the feathers. When you are about an 1/8″ from the eye of the hook trim away the butts of the feathers. Wrap back over the body to the bend of the hook, and tie in 4 strands of gold Flashabou. Trim the tips of the Flashabou so that they extend past the feathers about a 1/4-inch. Advance your thread forward to the bare shank.
Step 4:
Tie in 8-10 strands of gold Flashabou and cover the built up body back to the feathers with a series of tight wraps. Wrap the Flashabou back to the front of the body, tie off and trim away the excess.
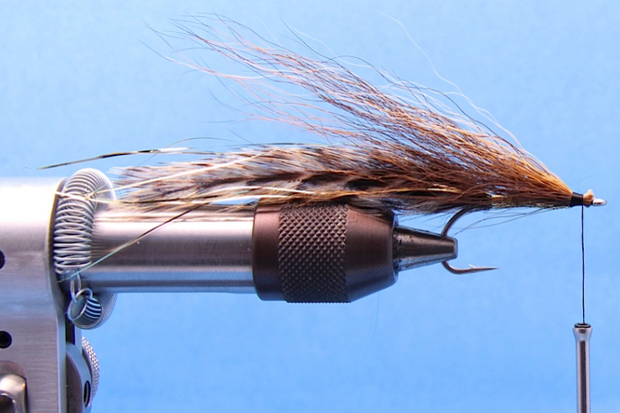
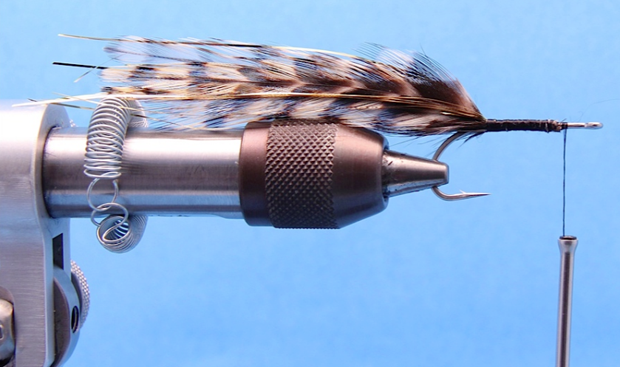
Step 5:
Directly in front of the Flashabou body tie in a pencil size bunch of dark brown bucktail, the section of hair should be slightly shorter than the tail, so about 3 1/2 inches in length. Position the bundle of hair so that it is on the near side of the hook, and secure with several tight wraps.
Step 6:
Repate the same process positioning the second bundle of dark brown hair slightly toward the far side of the hook. This “V tying” technique will give the fly “shoulders” or a wider profile at the front and top of the fly. If you use the “Hi-Tie” technique, or tie the two bundles on top of each other you can create a taller profile.
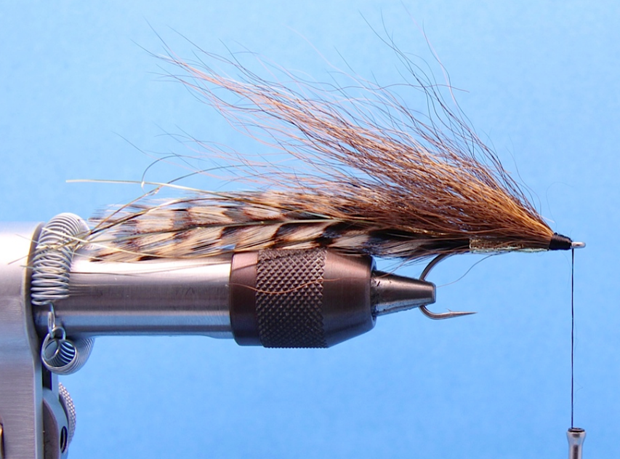
Step 7:
On the underside of the fly tie in a lighter color bundle of bucktail. The length of this bundle should be slightly shorter than the top two bundles. I like to cut the hair for the top and bottom of the fly from the same bucktail. The darker hair is typically taken from the back of the bucktail and the lighter or belly color of the fly is created from the underside or lighter portion of the bucktail. It’s ok of the two colors blend together, or if there are a few stray light or dark colored hairs, it will give the fly a more natural look.
Step 8:
On top of the fly, and at the same tie in point as the bucktail, tie in 8-10 peacock herls. The tips of the herl should be slightly shorter than the feathers. Cover the butts of the peacock herl, and any exposed butts of the bucktail with thread wraps. Build up and even head, whip finish and cut away the thread.

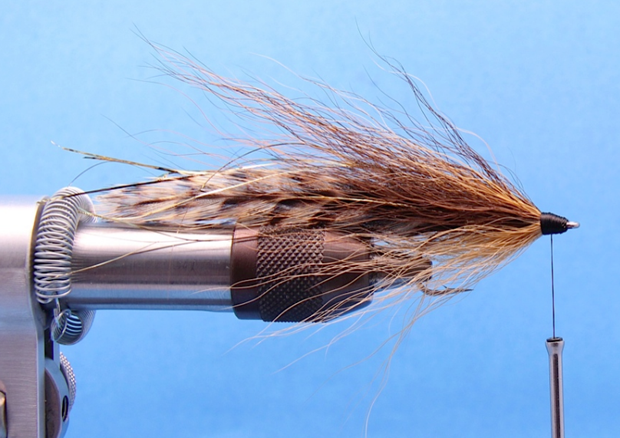
Step 9:
Finish the fly by coating the head with Clear Cure Goo Hydro.