

Curiosity catches the fish. An invention with limitless color combinations turns deadly for bass and baby tarpon
[dropcap]W[/dropcap]hile fishing Lake Okeechobee with Capt. Mark King, I had a series of follows and “near-strikes” but not much luck getting the bass to commit to a popper. We caught our share of fish on Wooly-buggers and baitfish patterns, but I left Lake O baffled by the ones that wouldn’t take on top. I sat at my vice remembering a fly created by legendary Hoosier hackle bender Everett Drake and began to tie. The Drake’s “Wounded Minnow” is a reverse deer hair bug that becomes more and more effective as it becomes distressed and sits lower in the film.
Some of Drew Chicone’s publications. You can get his ebooks by going to his website – see information box below.
Looking for a little more sink and length than the Wounded Minnow provides, I began to experiment with buck tail and then decided to try it with the hair only on the top giving an opportunity to feature a brightly-colored underbelly. When I pushed the fibers back with a hollow pen casing, tied it off and removed the tube, the butts of the buck tail flared out to the sides and the rest, as they say, is history.
Since that day, I have tweaked and tested the fly extensively. A little time spent in the neighborhood swimming pool revealed that, when slowly settling, the “wings” lend a back-and-forth tilting motion- the signature move of the Straw Boss.
Although white-on-white is one of the most successful colors, the possible color combinations are limitless. The Straw Boss is made from two bunches of buck tail- the second one represents the wing color and the lower part of the tail. I am an earth-tone guy by nature, so browns, reds and greens make up the bulk of my collection, but chartreuse and bright orange seem to do the job on the brightest of days. Black and purple has worked well on baby tarpon.
This fly takes a little patience to tie and to fish properly, but with the Straw Boss is in charge, I think you will see some serious results.
[information] [/information]Materials for the Straw Man
Hook: Mustad 34007 or similar, sizes 2-6
Thread: Danville 210 denier flat waxed nylon
Tail: Extra select craft fur
Body: Buck tail
Belly: Thread color
Legs/Wings: Buck tail in contrasting color
Misc: Hollow tube, .025 lead or lead free round wire
Adhesive: Clear Cure Goo Hydro
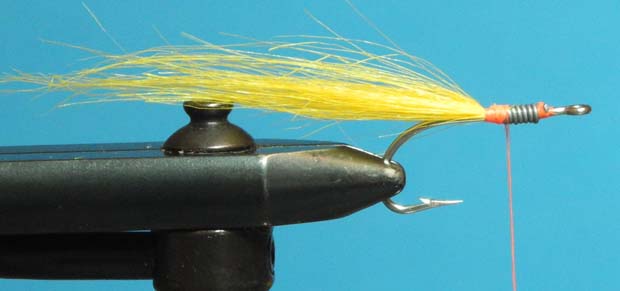
Step 1: Start the thread 1/8” from the eye of the hook and tie in a 1.5” length of lead wire. Cover the first ½” of the hook shank with thread and coat with cement. Wind wire back, coat with cement. Right behind the lead, tie in a clump of craft fur one fourth the size of a pencil.
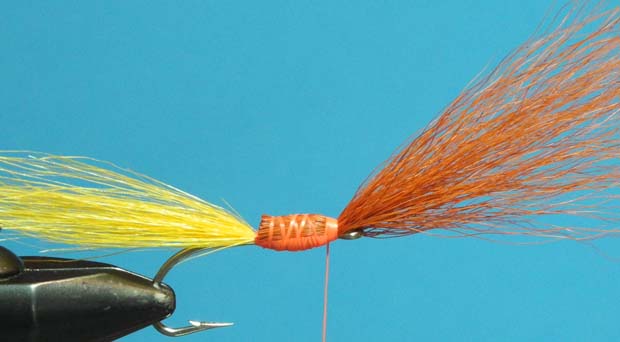
Step 2: Cover wire with thread and build a “football-shaped” underbody with thread. Tie in, tips forward, a bunch of buck tail about half the thickness of a pencil. This will become the color of the back, or shell, of the fly. Trim the butts 1/8” in front of the starting point of the craft fur tail. Wrap over the butts making sure that they stay on top of the hook. Continue to build the football-shaped body and apply intermittent coats of cement.
Step 3: At the same point, tie in a second bunch of buck tail about half the thickness of the first, making sure that the tips are even with the first bunch. This bunch of buck tail will represent the wings and the second layer of the tail. Trim butts 1/4” above the start of the craft fur tail.
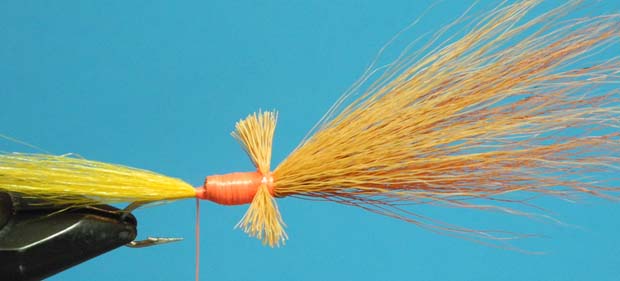
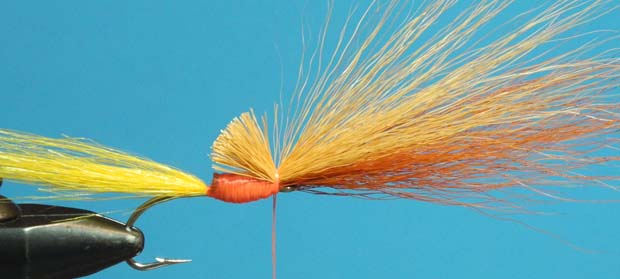
Step 4: With a needle or bodkin, divide the butts of the second bunch of buck tail and figure-eight them so they stick out to either side. Continue to build the underbody to a smooth shape ending with the thread at the point where the tail begins. If a bit of the buck tail butts show through on the top, no worries, it will be covered up in the next step.
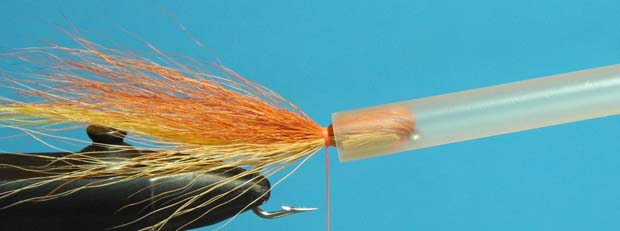
Step 5: Gently grasp all of the buck tail and fold back on the top of the hook, while pulling downward on the wings so they are not trapped underneath. Place tube over the hook’s eye and slowly push backwards. With the tube still in place, gather the buck tail tightly and tie off, applying enough pressure to tighten the buck tail.
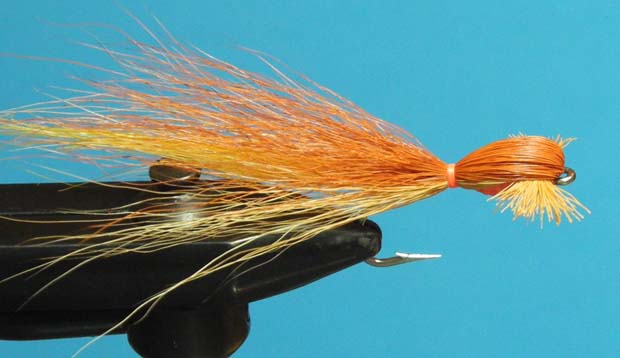
Step 6: Slowly remove the tube, whip finish and turn the fly over to pick out any of the wing fibers that are trapped and tug the wings outward. Trim wings if necessary. Apply several thin coats of Hydro (I often use three) to the back and underbelly.