

By Drew Chicone
[dropcap]C[/dropcap]rustaceans, shrimp, crabs, oysters, worms, pinfish, baitfish – dead or alive, it doesn’t really matter. Redfish are opportunistic feeders and they eat just about everything. So catching them on fly should be easy right?
Not for me. For years redfish were my “White Wale” on fly. Too spooky, near misses, had ’em and lost ’em, terrible tides, you name the excuse I heard it or said it. For the vast majority of us, catching redfish on fly is just not that easy – and tying and designing flies for them, takes a little more than luck and a sharp hook.
Redfish Flies is loaded to the gills with ultra high resolution photography illustrating how to tie and fish some of todays best redfish patters. Guides and guru’s from Florida to Louisiana and everywhere in between have contributed their go-to redfish bugs. There’s no guess work here, Redfish Flies has elaborate step-by-step instructions for tying these eight proven redfish flies will walk you through the process of creating flies that work. Insightful interviews with each patterns creator will help you understand what conditions the fly is best suited for, and how the fly should be fished. Stunning photos from renowned photographers Pat Ford, Adrian Gray and David McCleaf will awe and inspire you to dust off your vise and get tying!
The eight pattens outlined in Redfish Flies have been fine-tuned and rigorously tested on countless grass flats, oyster bars and mangrove shorelines. Tying and stocking your box with this proven assortment of flies will ensure you have the ammunition need to coax even the most refined redfish, and the insight provided in the interviews of the contributing guides and tying guru’s will help you understand what factors need to be consider to create your own productive redfish flies.
Step-by-step tying instructions for tying the Kung Fu Blue Crab, Fiddle Sticks Crab, Pine Island Ice Tea, Budagrassy Shrimp, Rump Shaker, Grass Monkey, Gulf Shrimp, and the Batman. Eight proven patterns for catching redfish. Redfish Flies is a 175 page downloadable PDF illustrated with ultra-hi resolution images.
Insights from eight saltwater fly tiers, including myself, Capt. Ron Ratliff, Capt. Daniel Andrews, Drei Stroman, Chris Kincaid, Capt. Joe Costadura, Bill Laminack, and Don Reed.
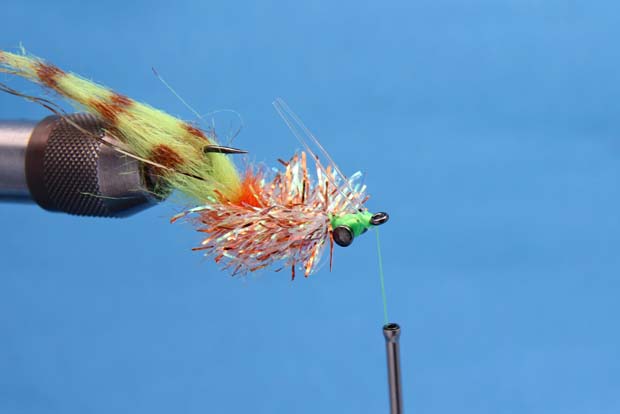
Here’s another one of my favorites that didn’t make it into my latest book. I have seen this pattern around for many years, and clearly it was developed for Tampa Bay. I’m not sure who came up with this deadly pattern, but you need to have a few in your box. This shinny and effective redfish bug can be seen at great distances, so it works great in dark or stained water. The Tampa Bay Redfish Fly is easy to tie and can be modified on the water to sink faster for deep grass.
Whip a few up and let me know what you think.
[information]
[/information]
The Tampa Bay Redfish Fly Recipe:
Hook: #2 Gamakatsu B10S or similar saltwater hook
Thread: Fl. Green Danville Flat Waxed Nylon 210
Eyes: 5/32 Brass Dumbbell Eyes
Body: Gold or Copper Flashabou Minnow Body (Mylar Tubing)
Tail: Chartreuse Extra Select Craft Hot Orange EP Streamer Brush Short Fivers 0.5-inches
Barring: Delta Brown Chartpak Marker
Adhesive: Clear Cure Goo Hydro
Misc: 30-pound monofilament
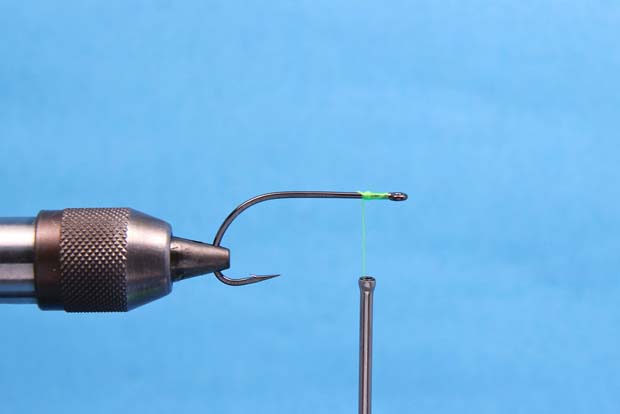
Step 1:
Start the thread at the eye of the hook and wrap back approximately 1/4” (20 wraps) leaving enough room to add the deer hair and weed guard.
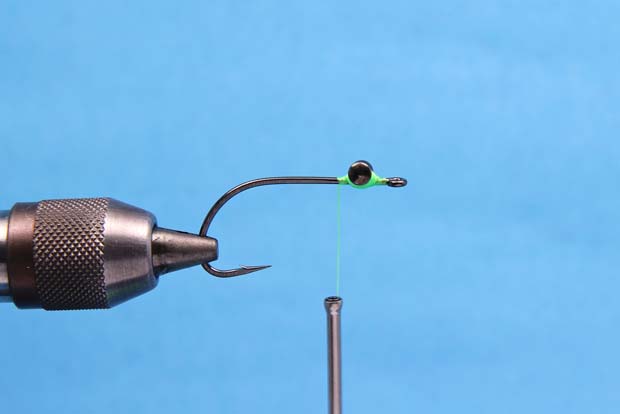
Step 2:
Attach the dumbbell eyes with a series of figure eight wraps, making sure that the eyes are secure and will not spin. Apply a drop of head cement or zap-a-gap to lock Them in place.
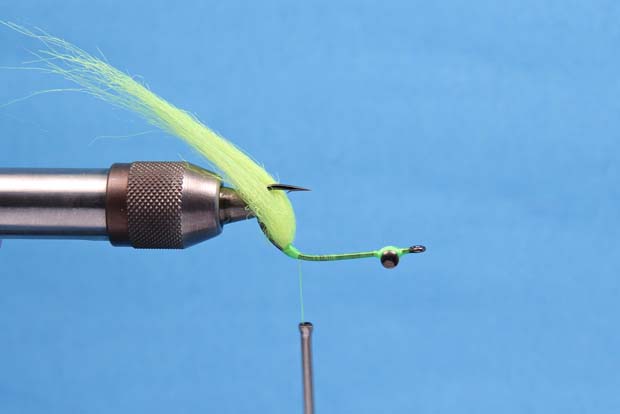
Step 3:
Turn the hook over in the vise (hook point up) and Wrap the thread back to the bend of the hook and tie in the Kraft fur so it is pointing up at a 40 degree angle.
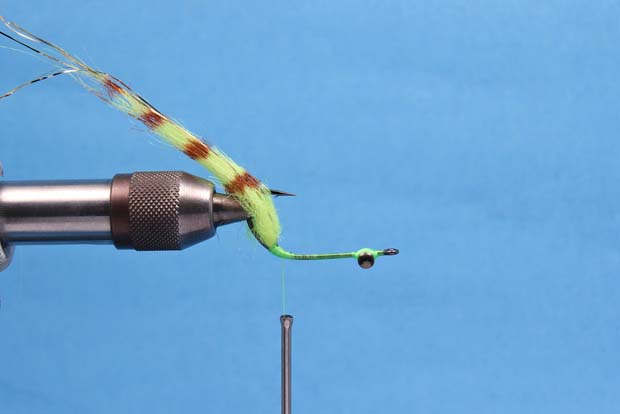
Step 4:
Bar the Craft Fur with a brown permanent marker. Double a single strand of gold Flashabou and tie it in at it’s middle. Place one half on each side of the hook and secure in place. Trim off the excess Flashabou so it is even with, or just slightly longer than the Craft Fur tail.
Step 5:
At the base of the Craft Fur tail, tie in the EP streamer brush.
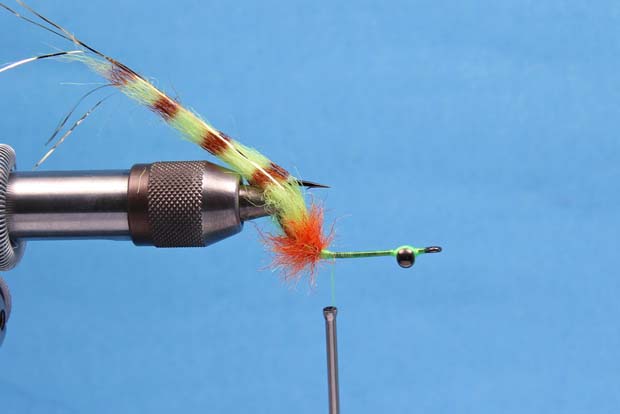
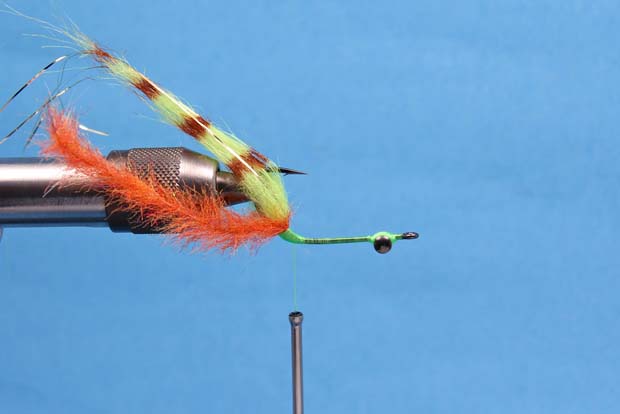
Step 6:
Wind if forward 3-4 wraps to cover the butts of the Craft Fur bump. Tie off the streamer brush with 3-6 wraps and work the wire back and forth until it breaks off. Clipping the wire with scissors or nail clippers will leave a sharp burr, and could potentially fray or cut your leader.
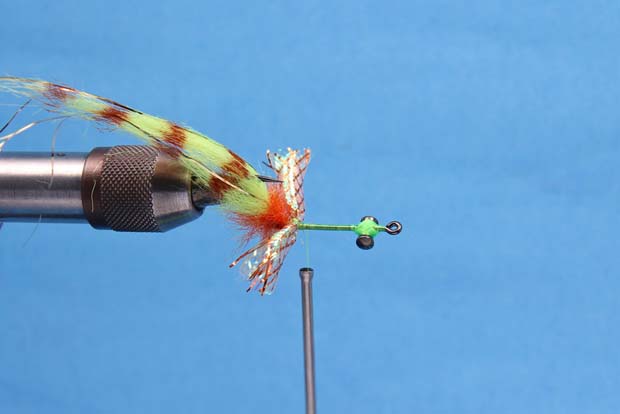
Step 7:
Cut a 1-1/2″ piece of mylar tubing and tie it in at its middle with a series of figure eight wraps. Advance your thread in front of the section.
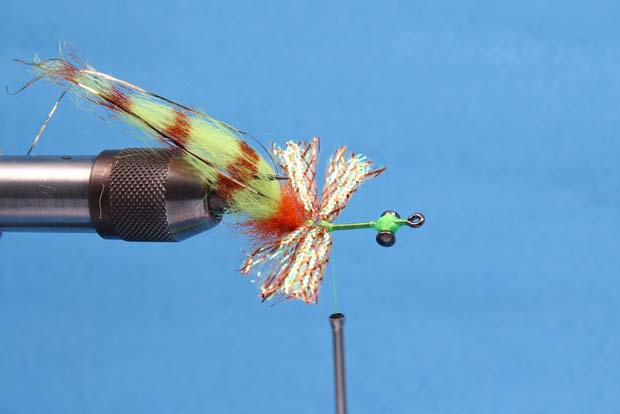
Step 8:
Continue this process forward with as many sections of Mylar Tubing as needed to cover the shank of the hook. Since the fly will be trimmed in a leaf shape, slightly shorter sections of Mylar Tubing can be used as you progress to the dumbbell eyes.
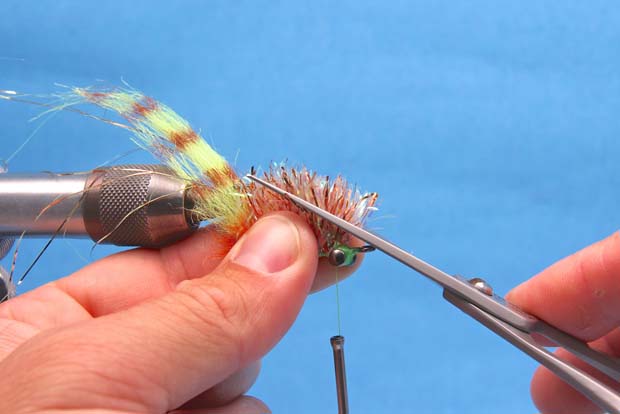
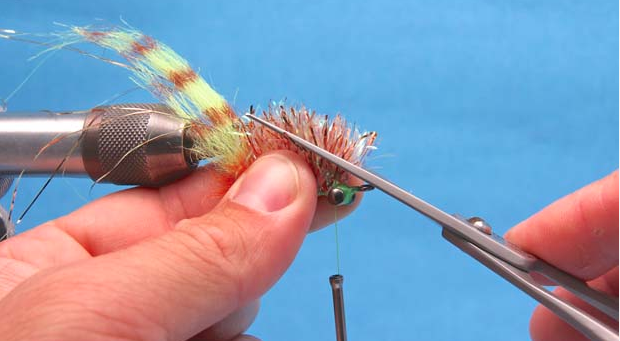
Step 9:
Once your reach the dumbbell eyes, with your non dominate hand, pull all the sections of Mylar Tubing up and pinch them together. Line up your scissors from the eye of the hook to just underneath the point of the hook, and trim the Mylar Tubing being careful not to cut off the Flashabou or tail.
Step 10:
Advance the thread forward to the eye of the hook, and tie in your favorite style of weed-guard (single or double post). Whip finish and cut away the thread. Trim the monofilament weed guard even with the barb of the hook.