

[dropcap]A[/dropcap]Dropper Loop allows you to put a loop in the middle of your line instead of just on the end of it. The Dropper loop knot is also known as a Dropper Knot, and Blood Loop Knot – used to attach hooks, flies, and sinkers.
It’s most often used by bottom fishermen sinker with a a jig, or to make multiple hook bait rigs, and fly fishermen use it to attach a second fly (or dropper) to their leaders.
It’s not difficult to learn and you’ll be able to make up better rigs than you can buy in the stores and save a few dollars at the same time. Their are several YouTube videos on how to tie the dropper, but the method used as shown below is much easier to tie than expressed in the videos.
NOTE: Lubricate the knot well (this is very important) and draw the knot tight carefully and evenly. I find it easiest to take the two ends of line in my hands and the loop in my mouth to draw it up tight. When you think that it is tight lubricate it again and tighten it some more! Some anglers prefer to keep the Dropper loop short so they can attach a single strand line to the Dropper loop using a Perfection knot – creating a loop to loop connection. This allows the angler to determine the length of the dropper line.
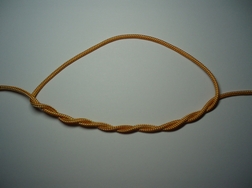
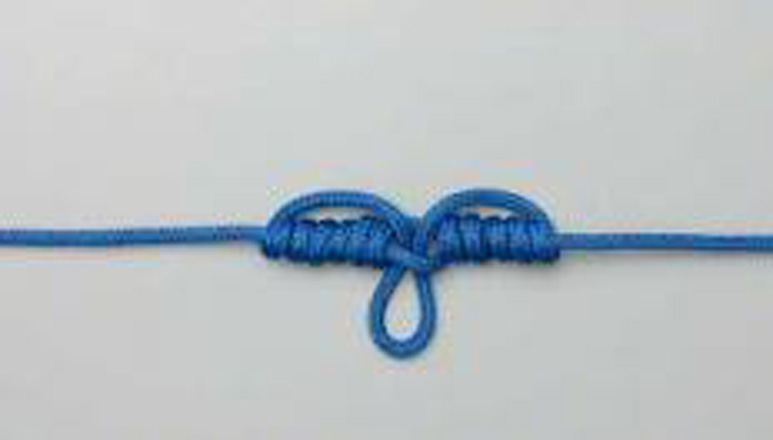
Make a loop in the line where you want the dropper to be and and pass the loop around itself – wrap the tag end around the standing line several times (6 to 10). For 100-pound test line 3-times is enough
Wrap the loop around itself – lighter trout leaders of mono will require more wraps – up to ten.
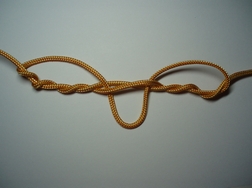
Step two. Pass the opposite side of the loop through the center of the wraps that you have created. You will notice that the size of the loop that you started with dictates how long the dropper will be.
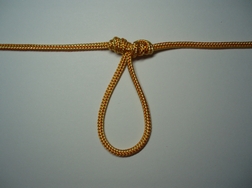
Step three. You will notice that the size of the loop that you started with dictates how long the dropper will be. Lubricate the knot well (this is very important) and draw the knot tight carefully and evenly. I find it easiest to take the two ends of line in my hands and the loop in my mouth to draw it up tight. When you think that it is tight lubricate it again and tighten it some more!