

Megamouth – Flies
Megamouth
By Henrik Agerskov Jensen – Denmark
[dropcap]I[/dropcap]n Denmark, where I live, one of our main types of fishing is for seatrout, a sea run brown trout. We fish for them right from the beach. It is quite comparable to striper fishing from the shore. These Megamouth flies were originally developed for this type of fishing, and the pattern I will show you here is one of the most dependable flies I’ve developed.
Since the first model, I have made many other flies with this same basic design, mostly baitfish imitations, like sand eels, pilchards, mullets etc… but also a worm we have here in Denmark each year, just like you have in some places of the US. The worms move with a wiggling action, which is perfectly imitated by the disc mouth. So the Megamouth flies are as much a style of fly that can be applied throughout a range of sizes and applications as they are an actual pattern.
I designed the first Megamouth fly because I wanted a pattern with a wobbler like wiggling action. I have used the different action discs on the market, but they are all difficult to cast (a lot of air resistance) and they are difficult to incorporate in the fly design without looking clumsy. The Megamouth fly is my solution to this issue, and right from the first strip, it has proven to be a truly killer fly.
Here are the step by step instructions:
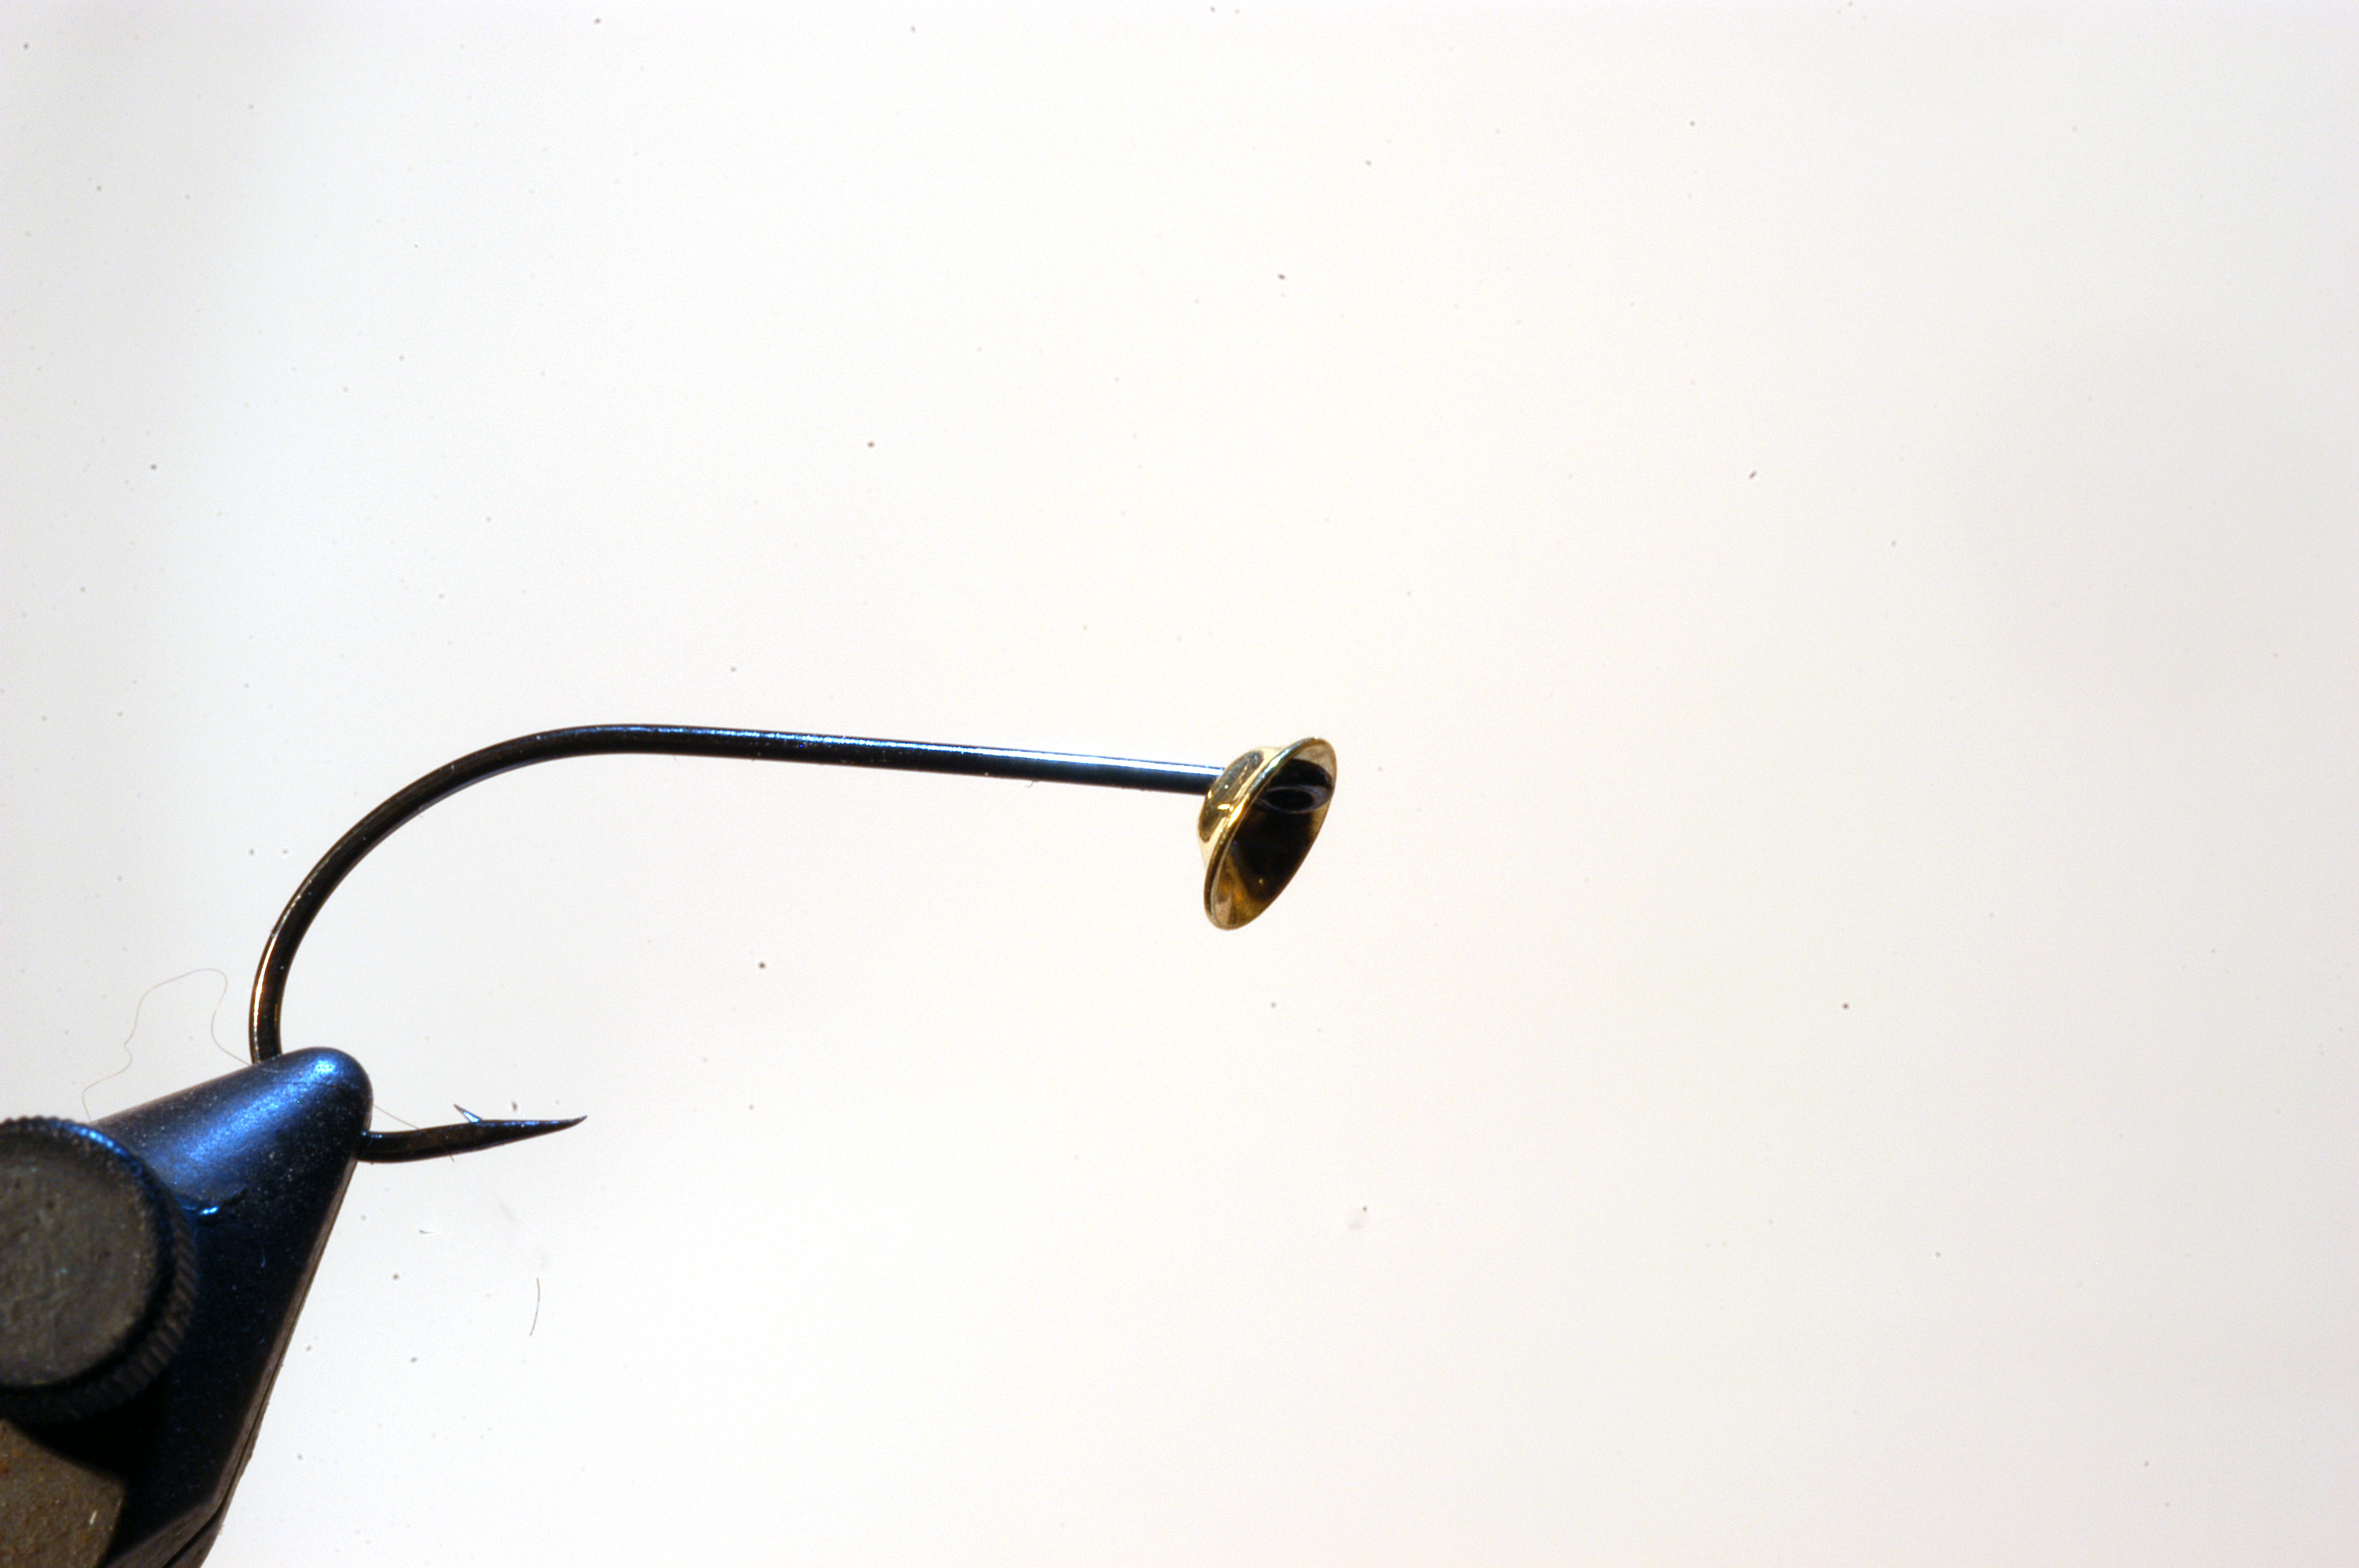
1.) Start putting the disc head on the fly backwards!!! For my smaller flies like this Goby and slim flies like sand eels I use a 6 mm (app. ¼ Inc.).
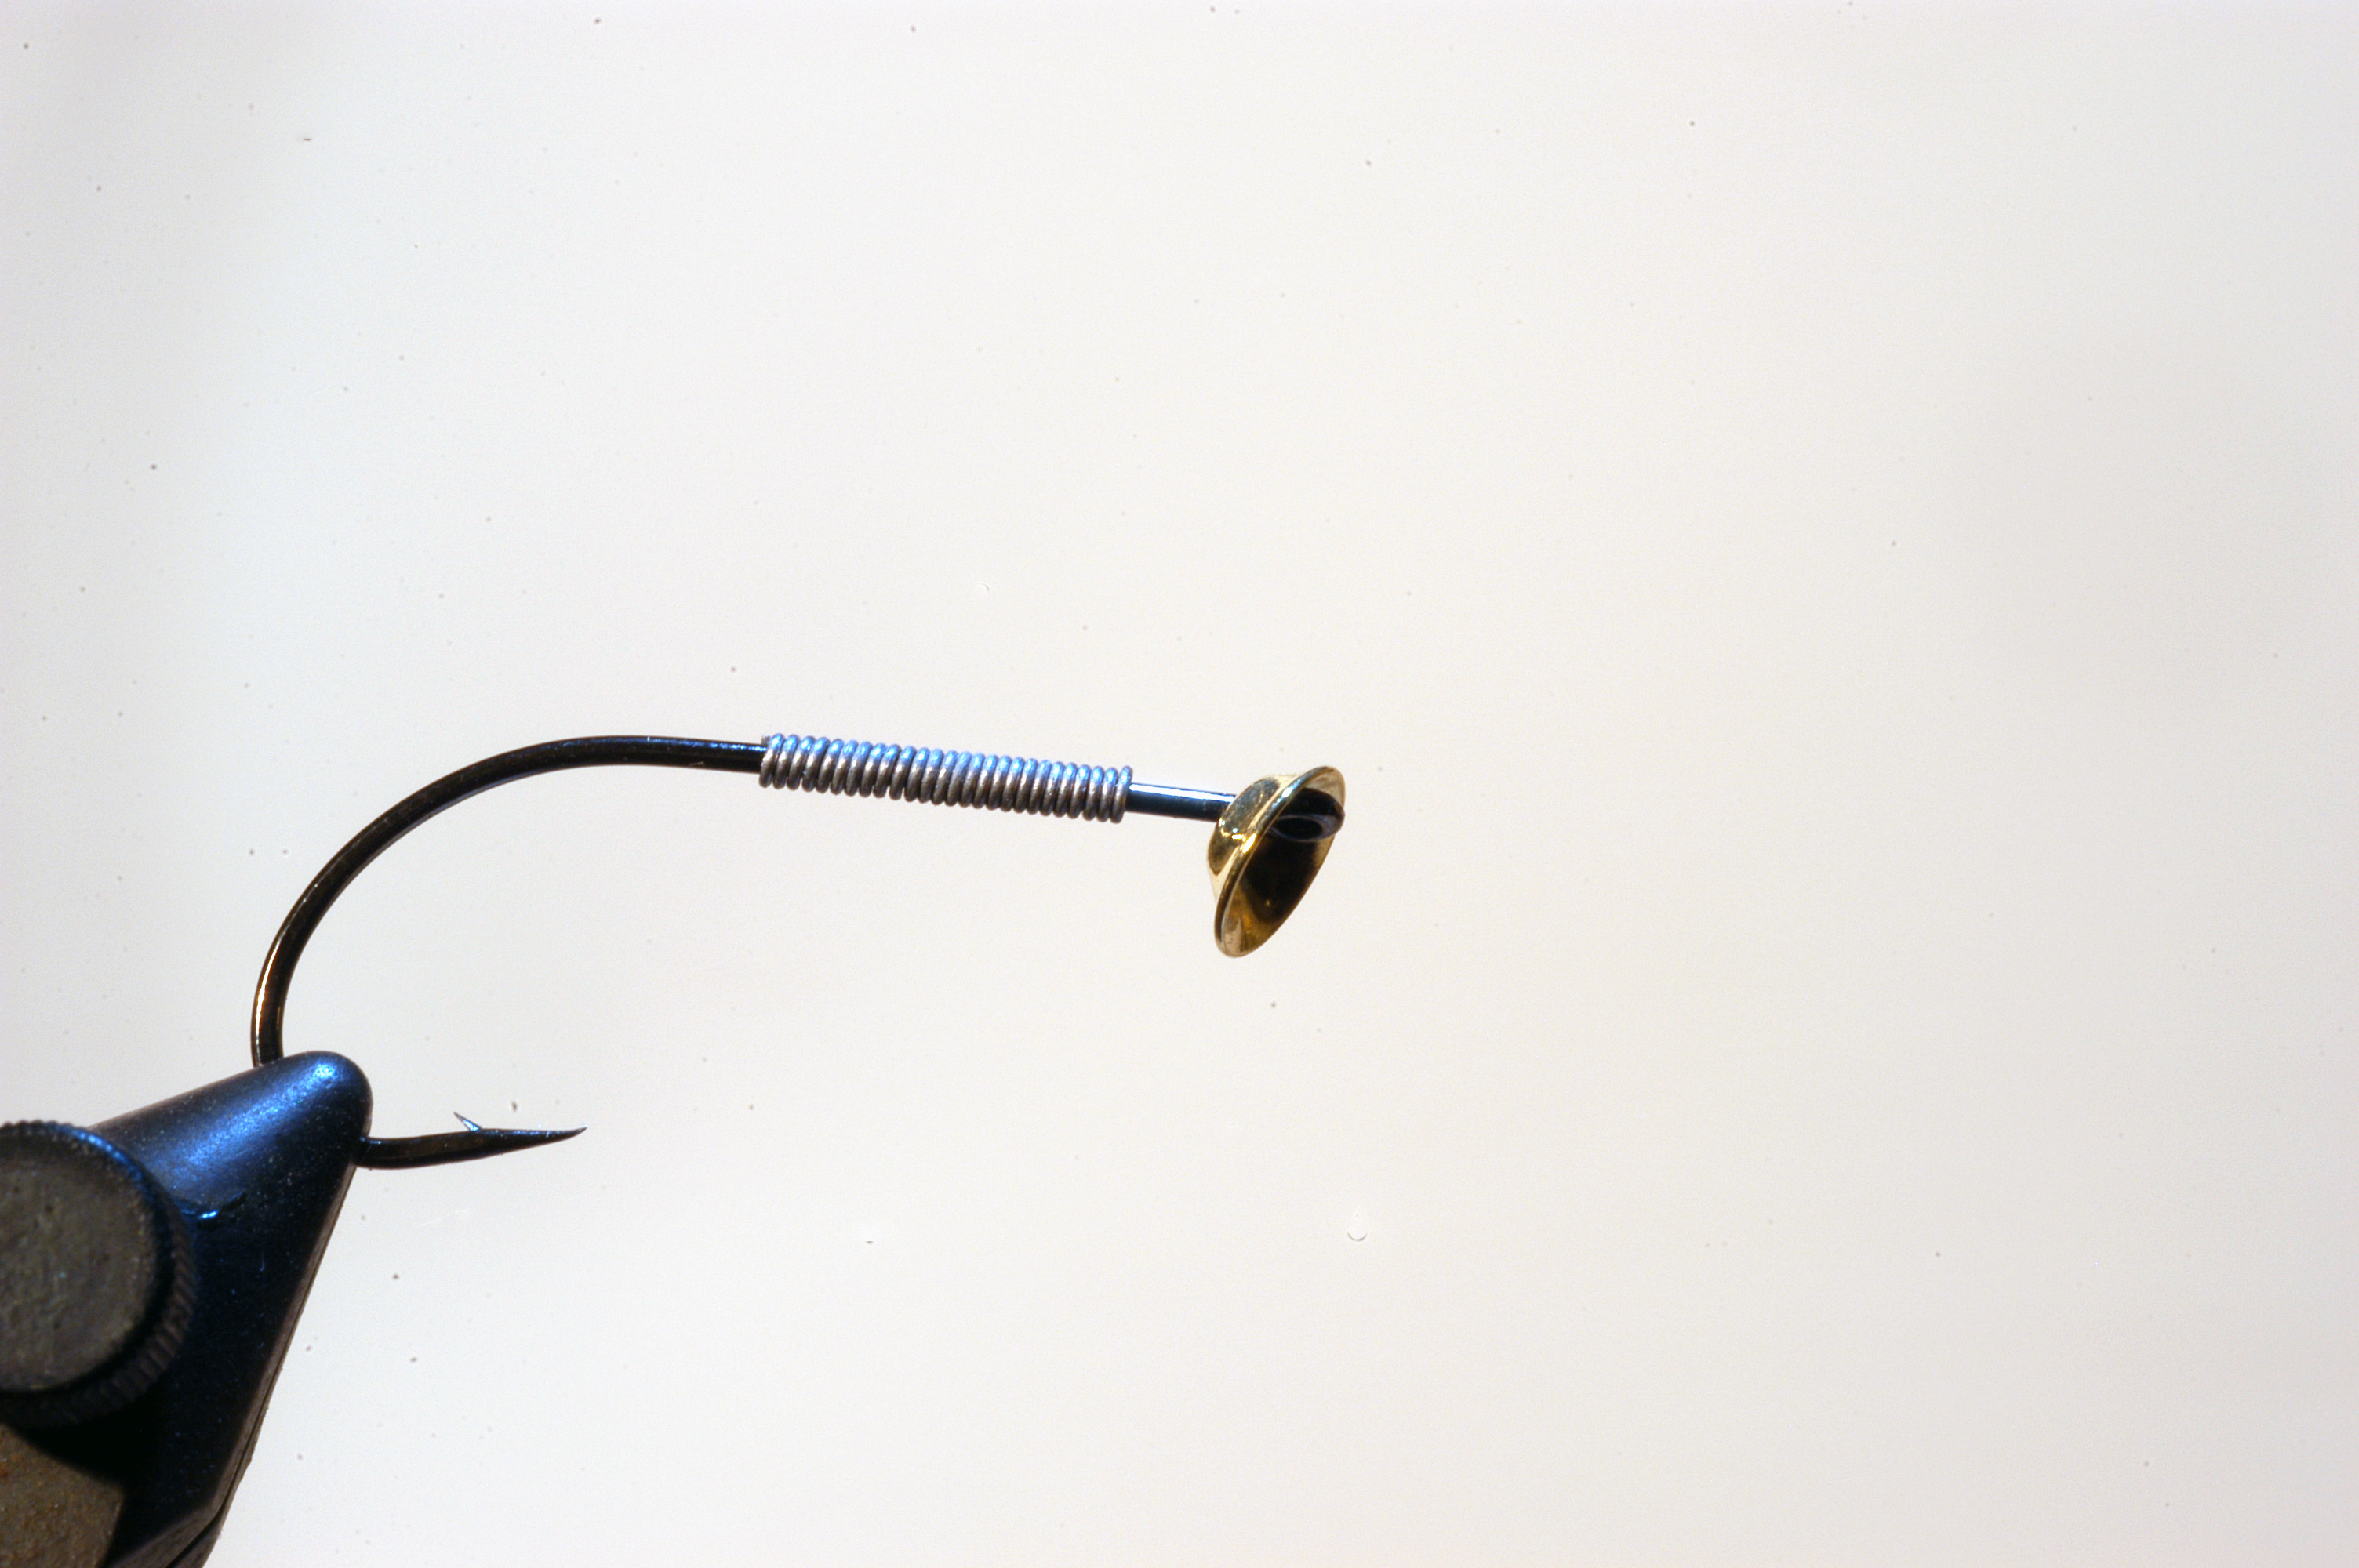
2.) Add some weight to the front half of hook shank.

3.) Tie in a thin bunch of creamy yellow ramswool/sheeps fleece/sculpin wool. I brush the bunch before I tie it in.
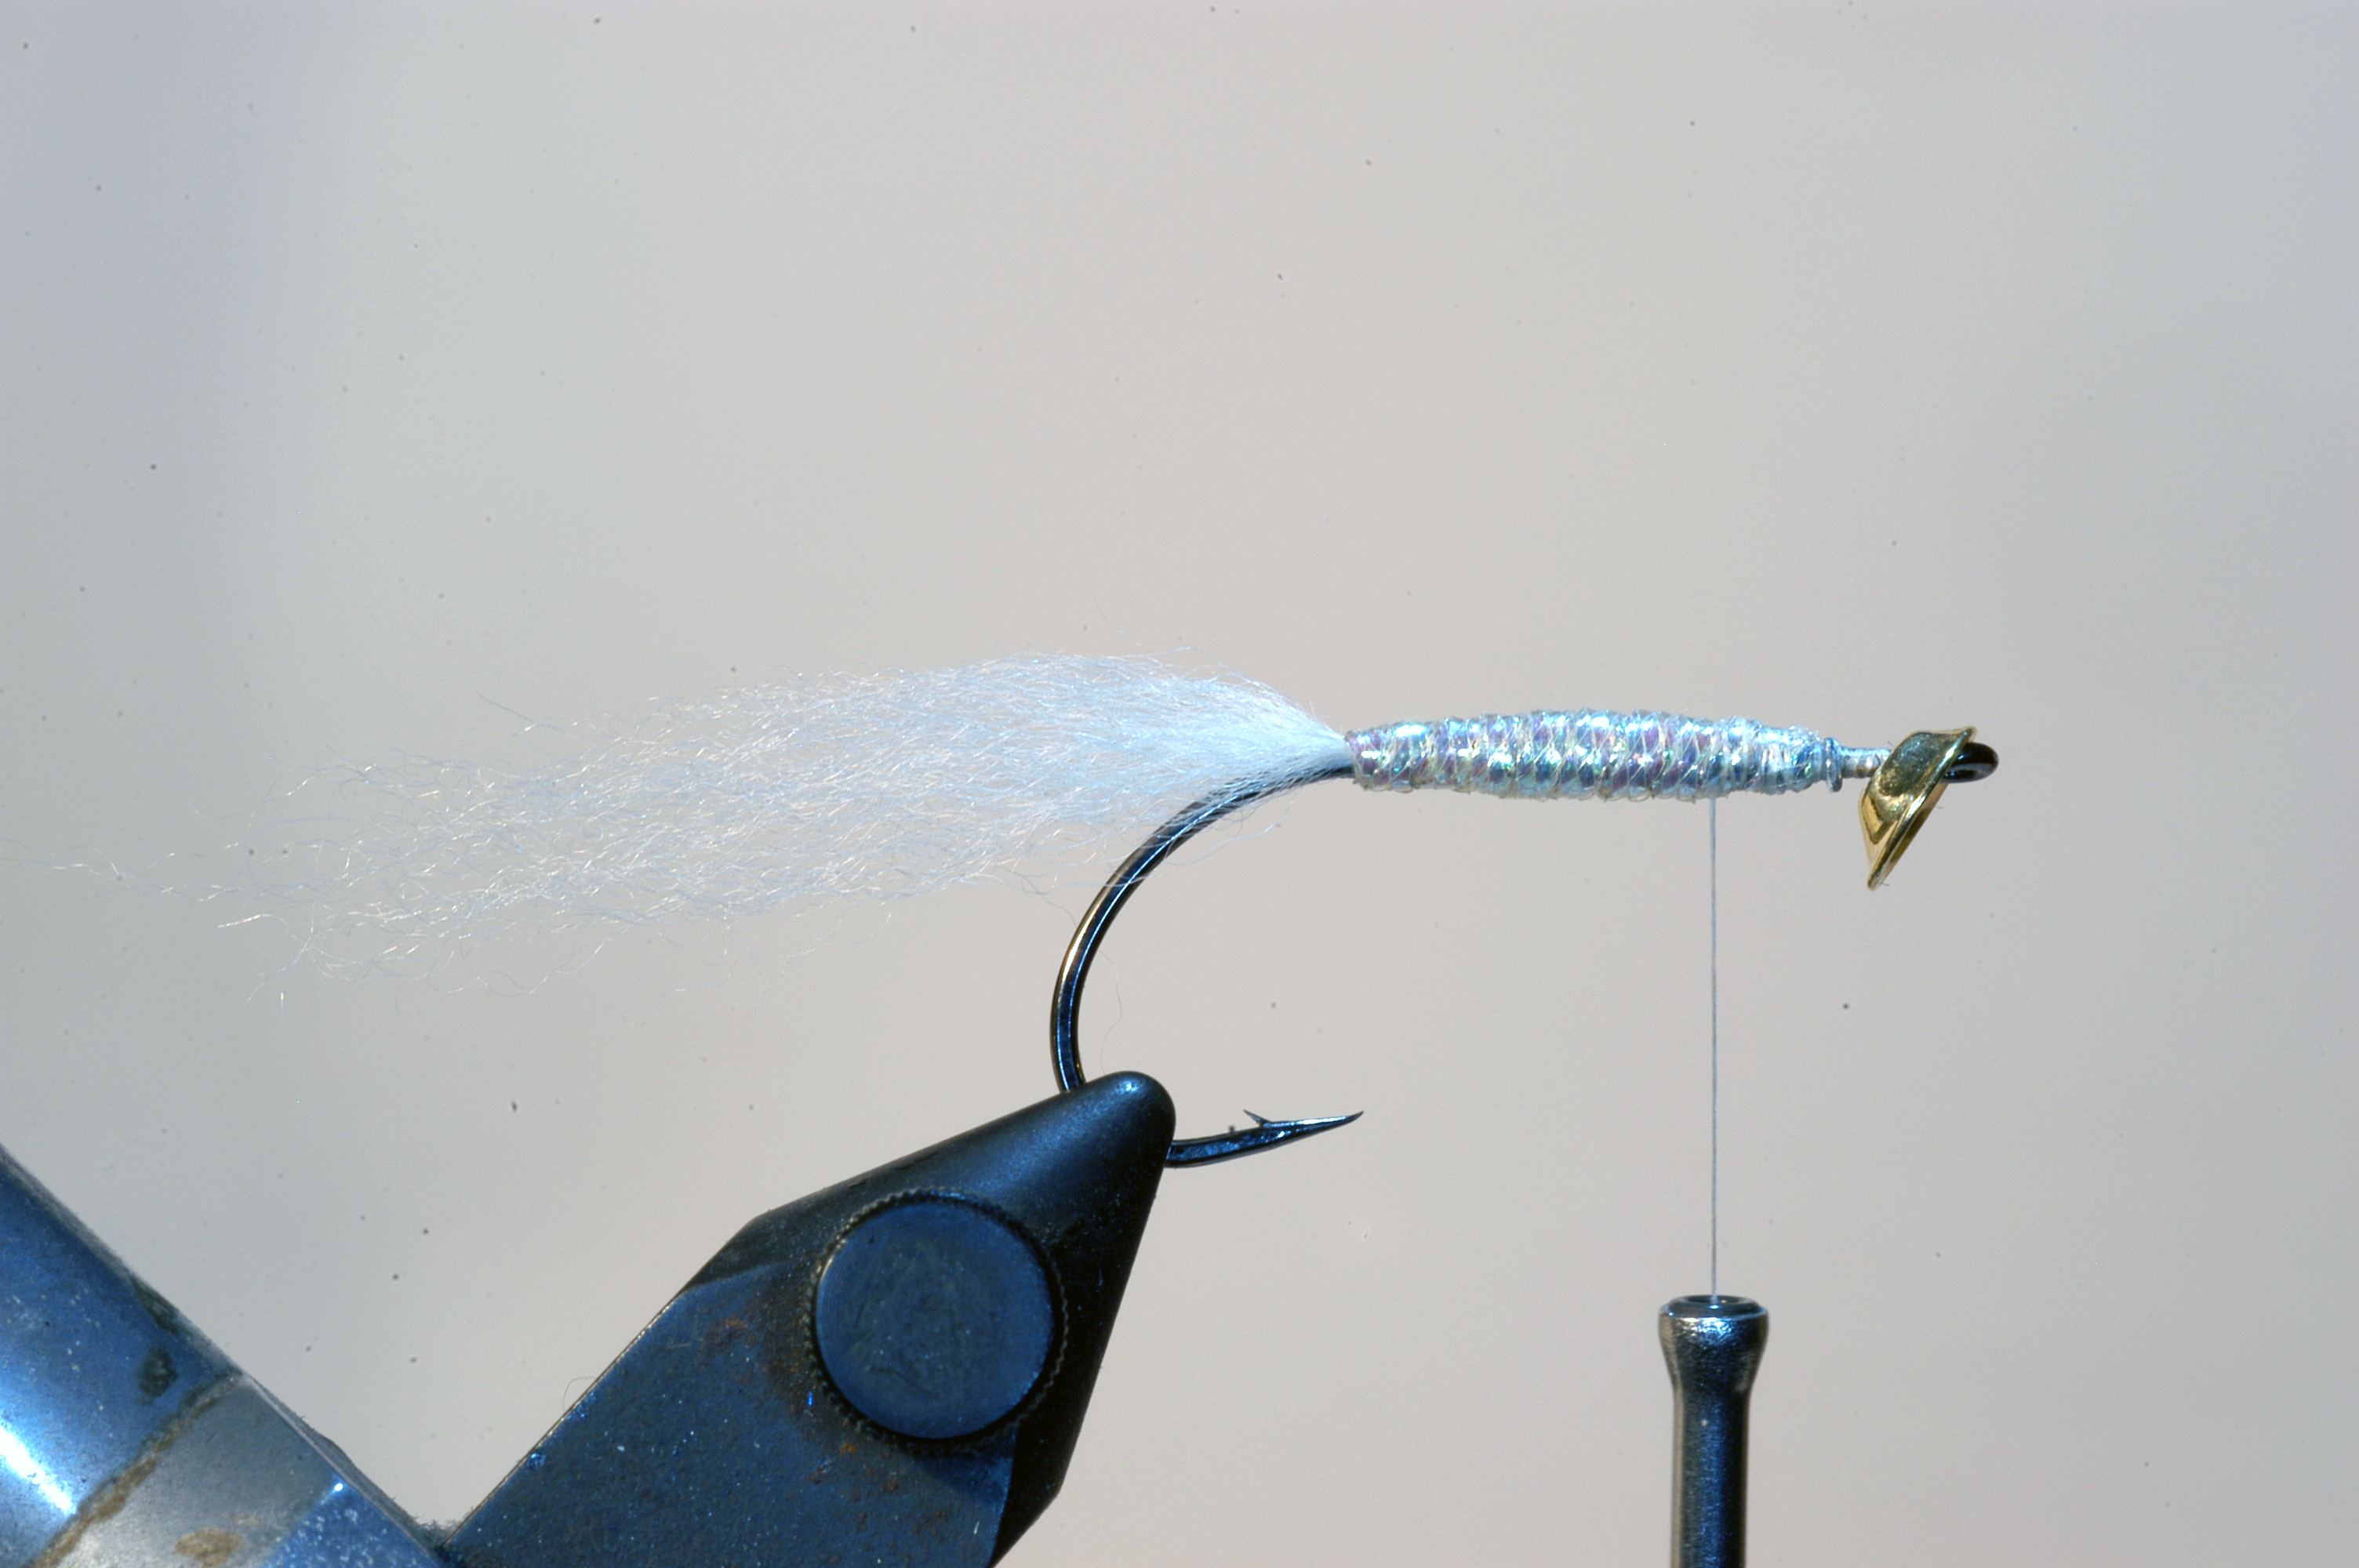
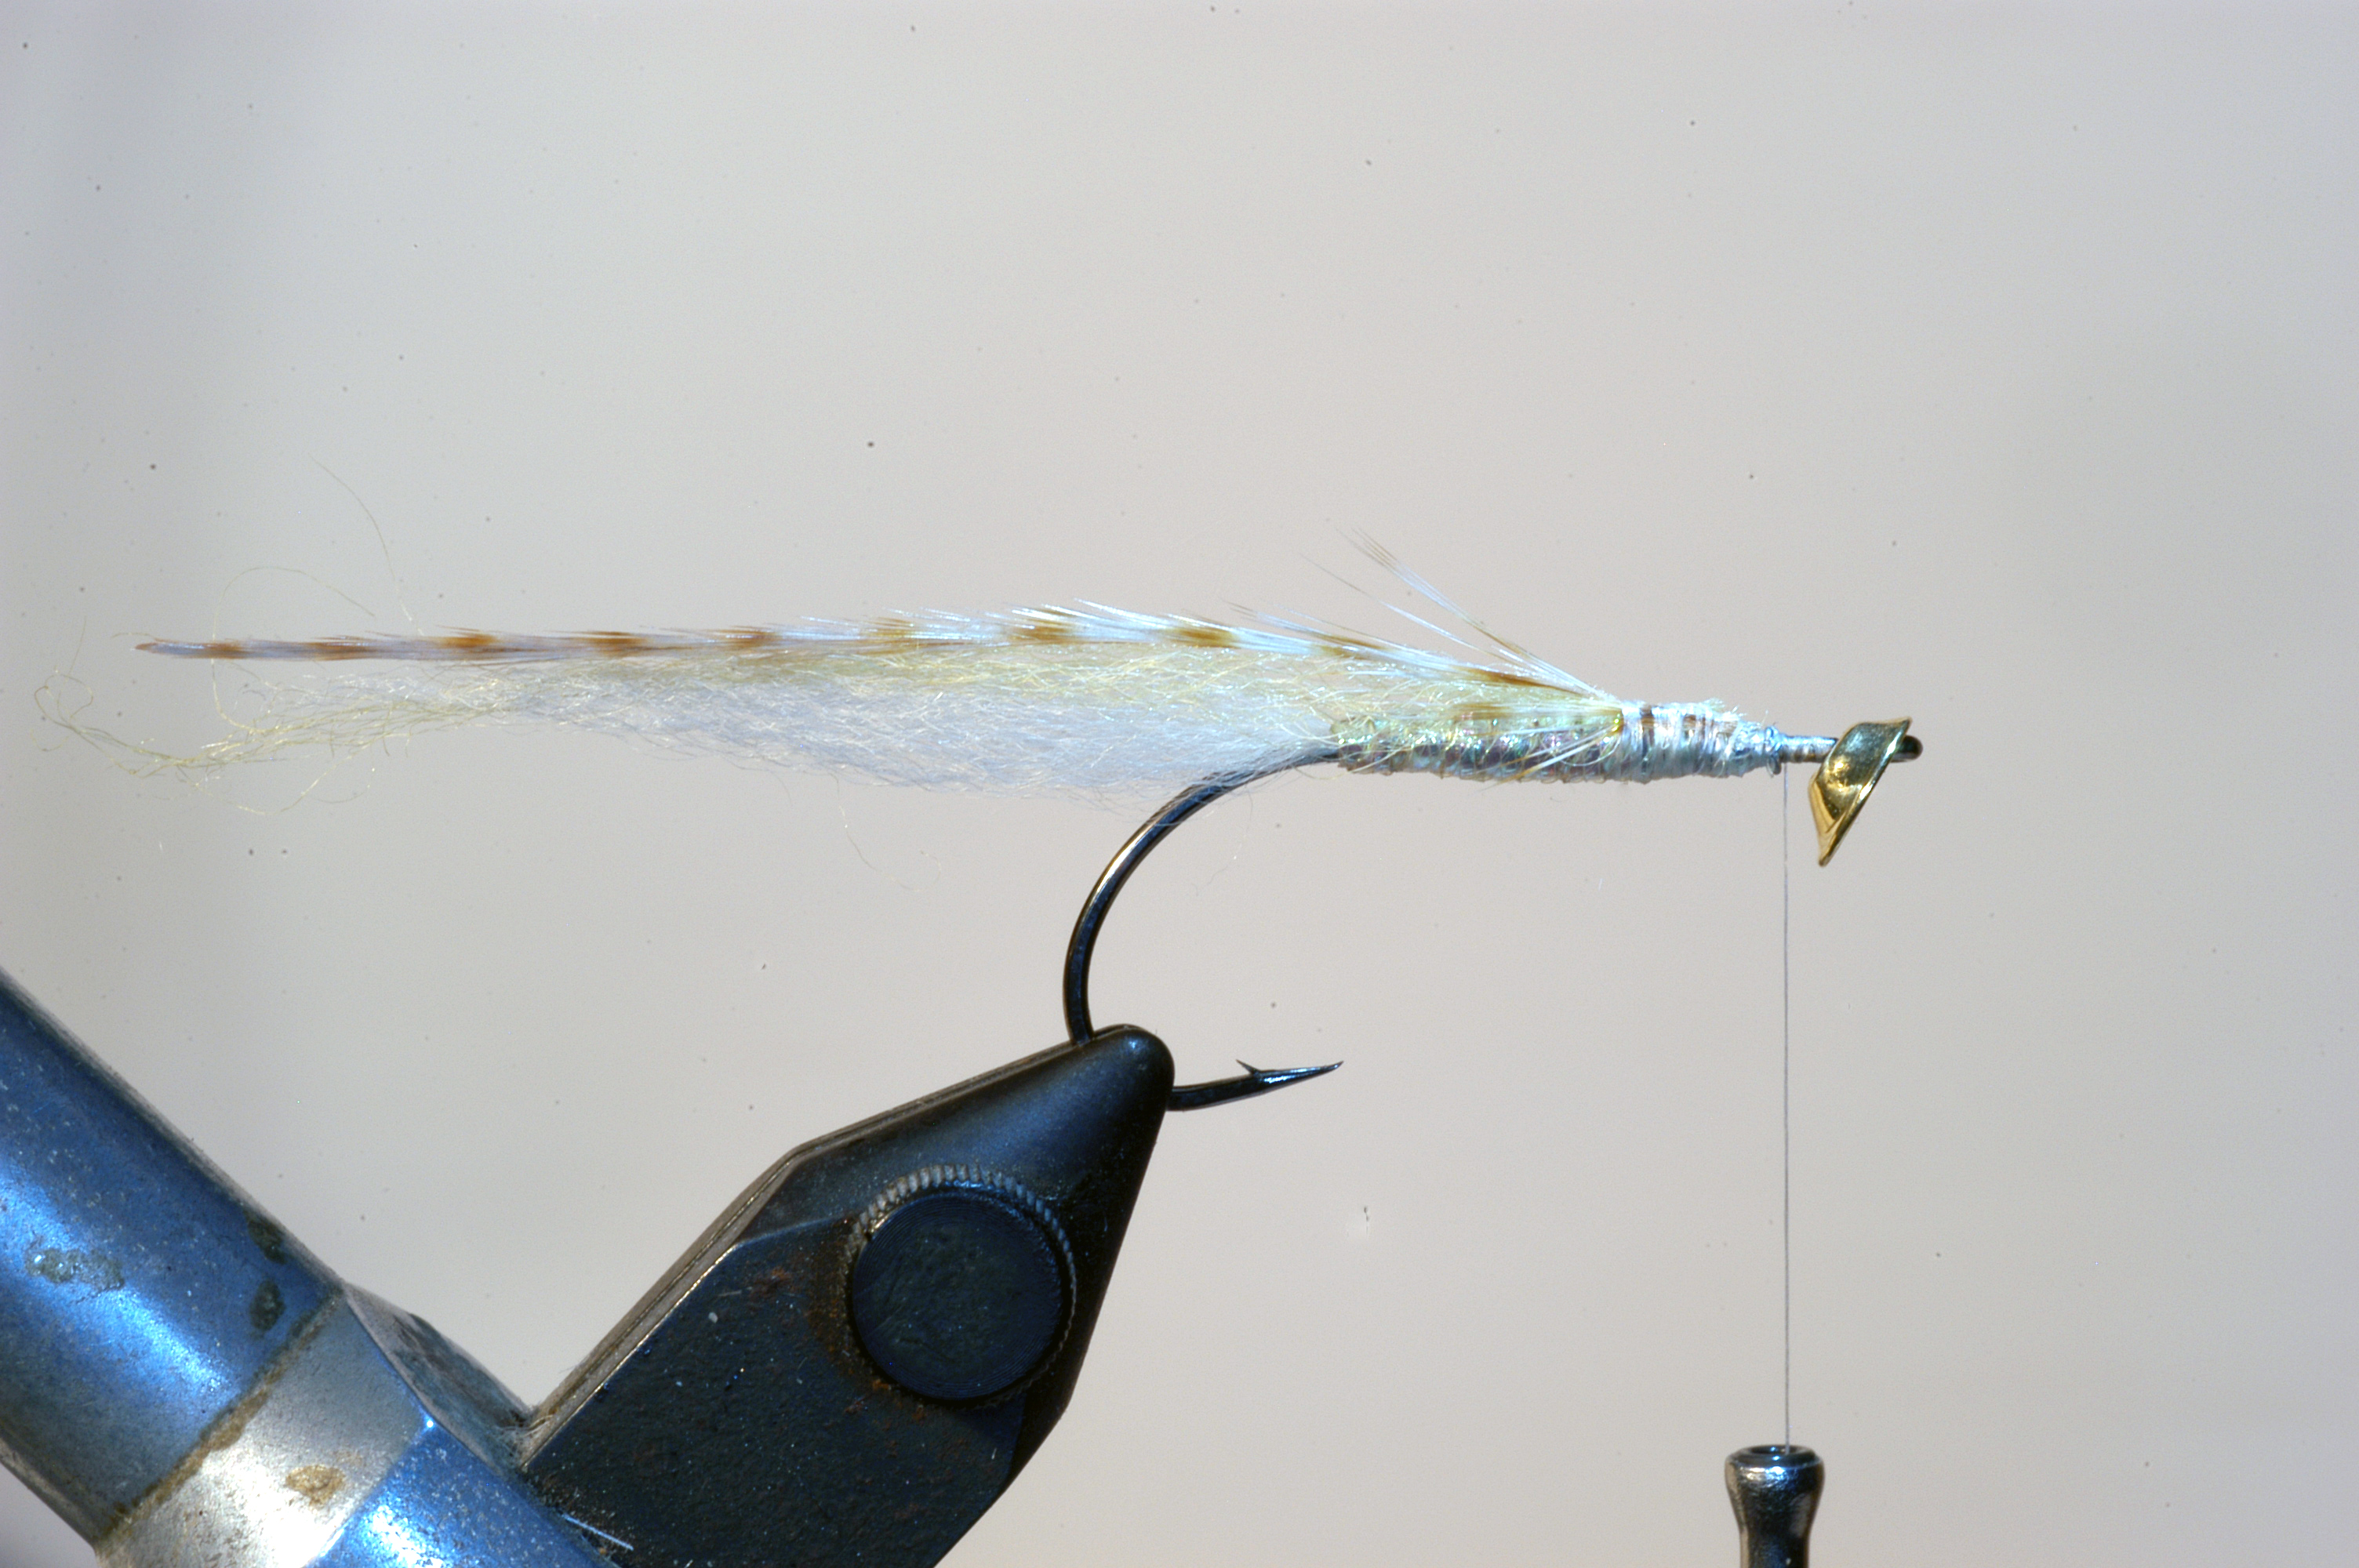
5.) Tie in a saddle feather (flat wing style).

6.) Use the bottom part of that feather – the marabou part – to make a hackle. 1-2 turns only.
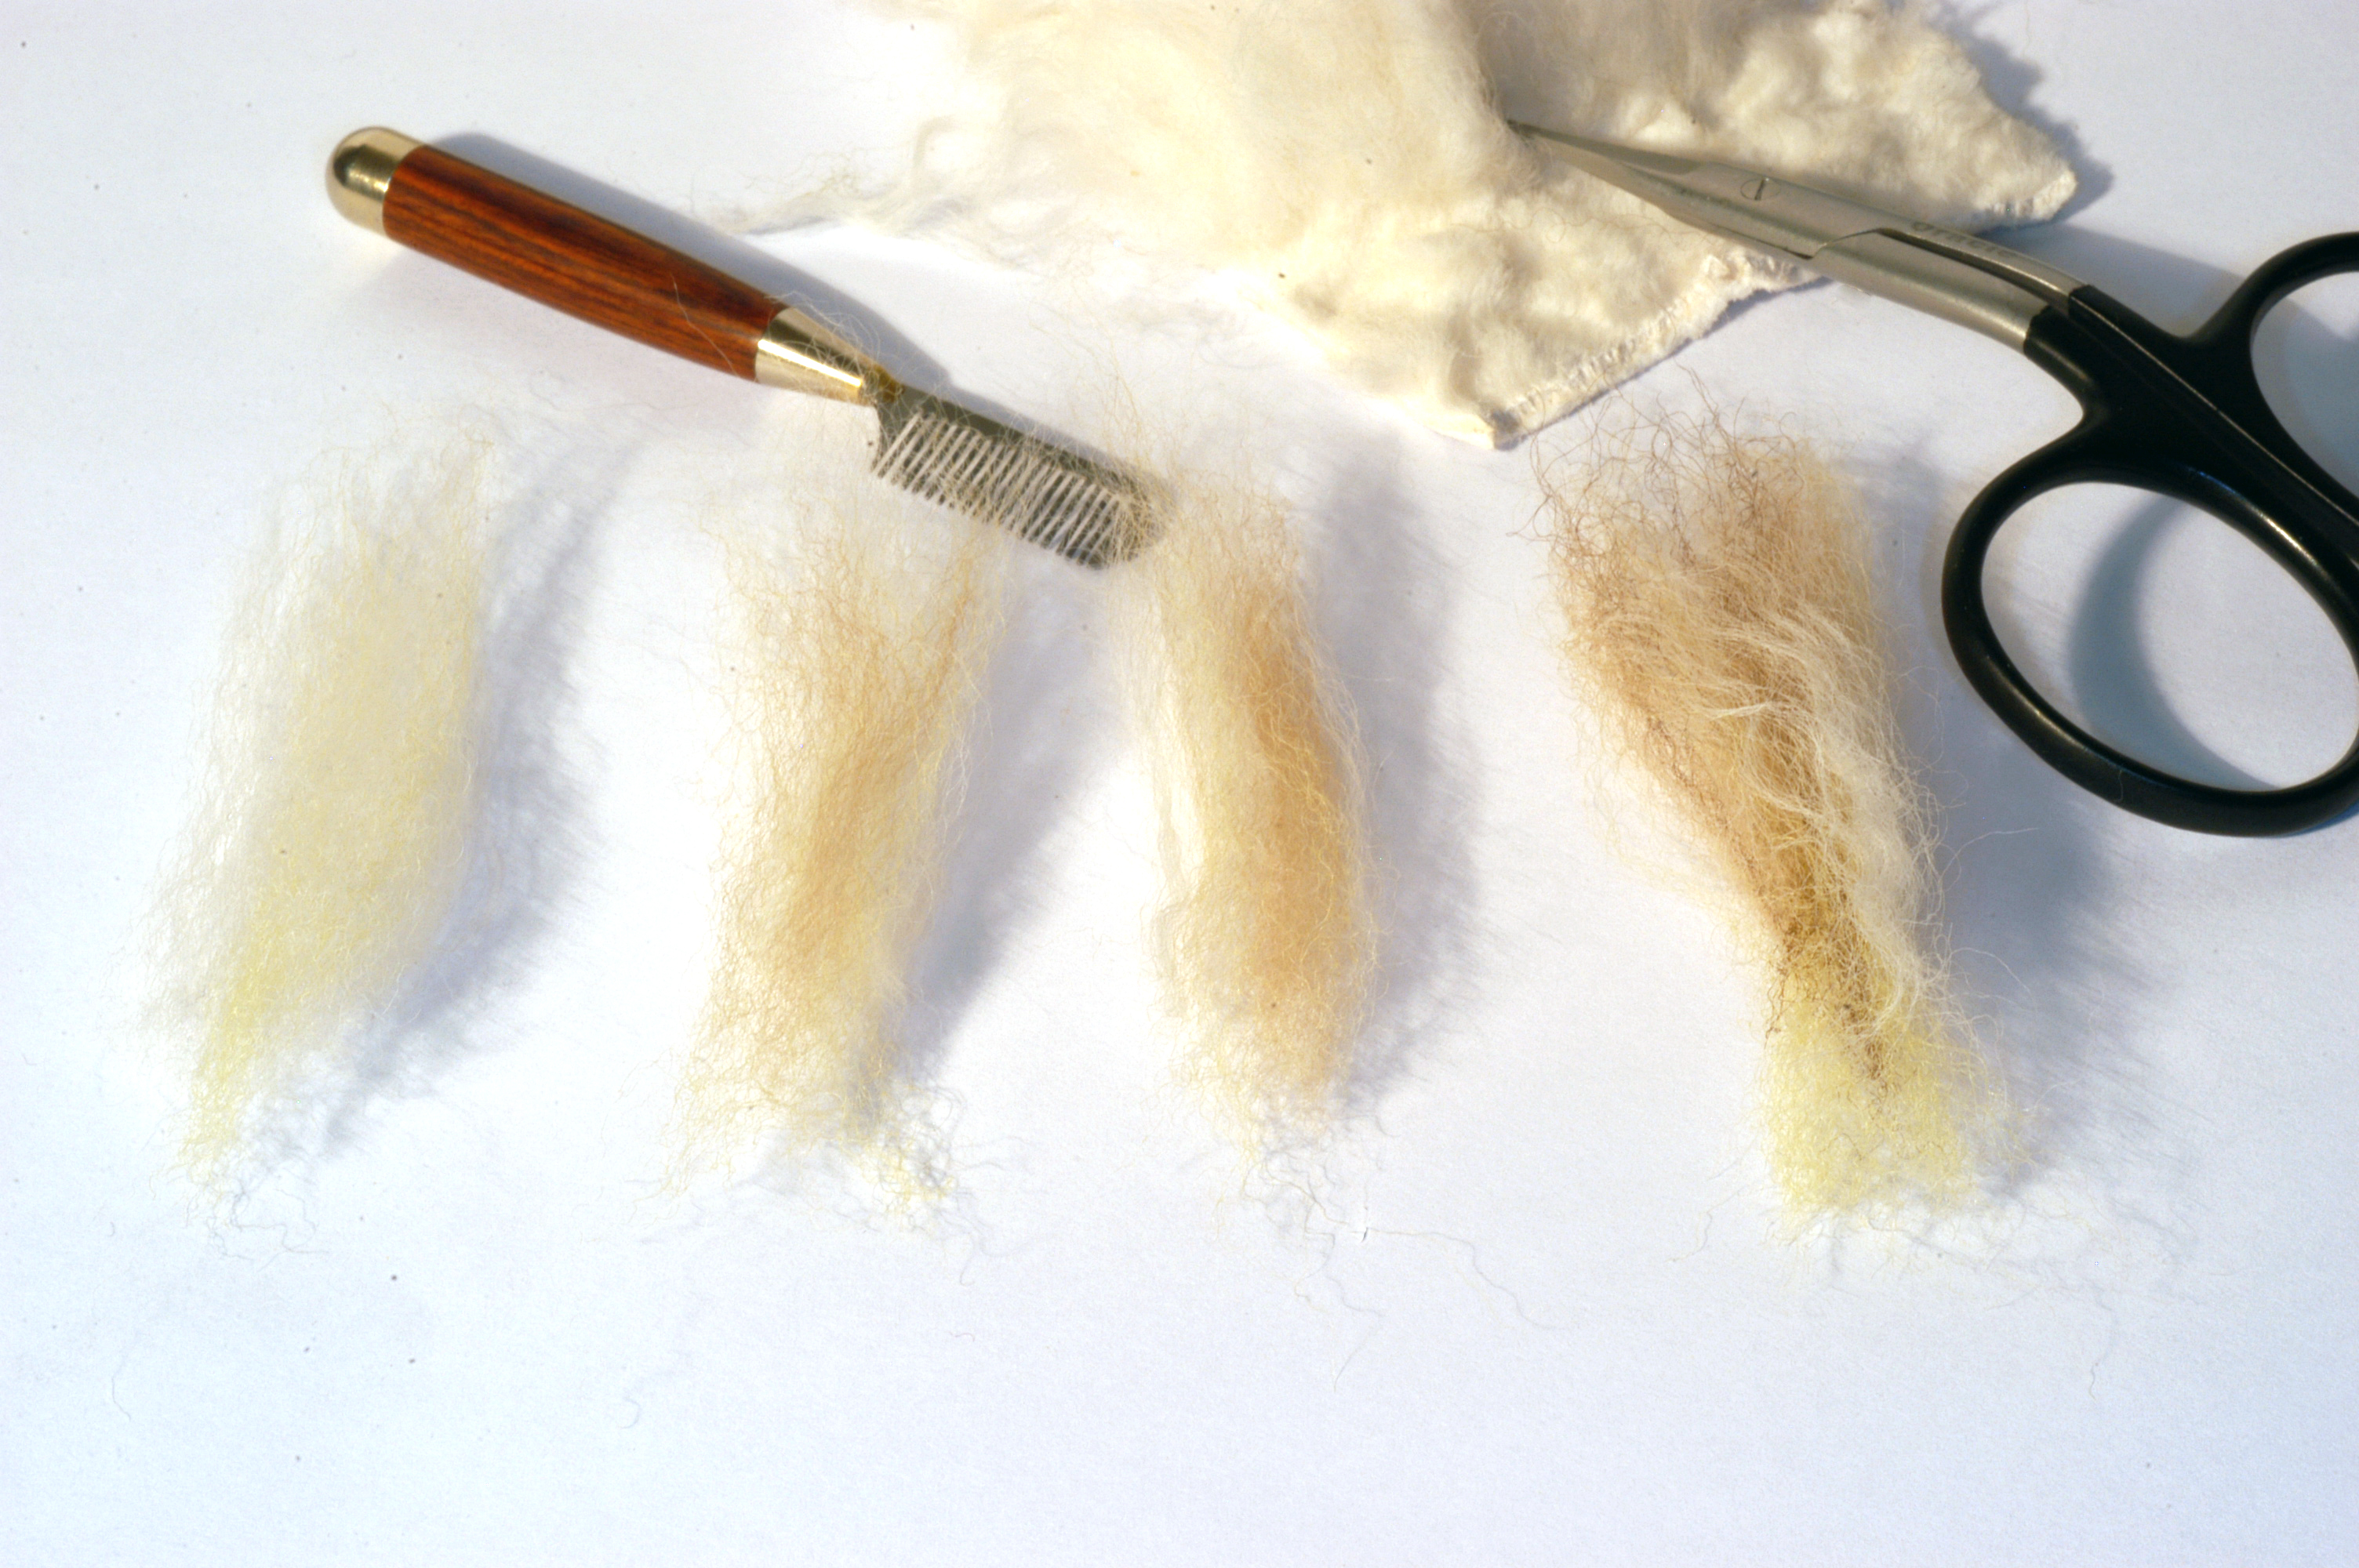
7.) Now prepare the bunches of sculpin wool. For this fly I tie them in 4 bunches around the fly. The belly is white mixed with Creamy Yellow. The sides are mixed White, Creamy Yellow and tan. The top is white, Creamy Yellow, Tan and a few hairs in dark brown.
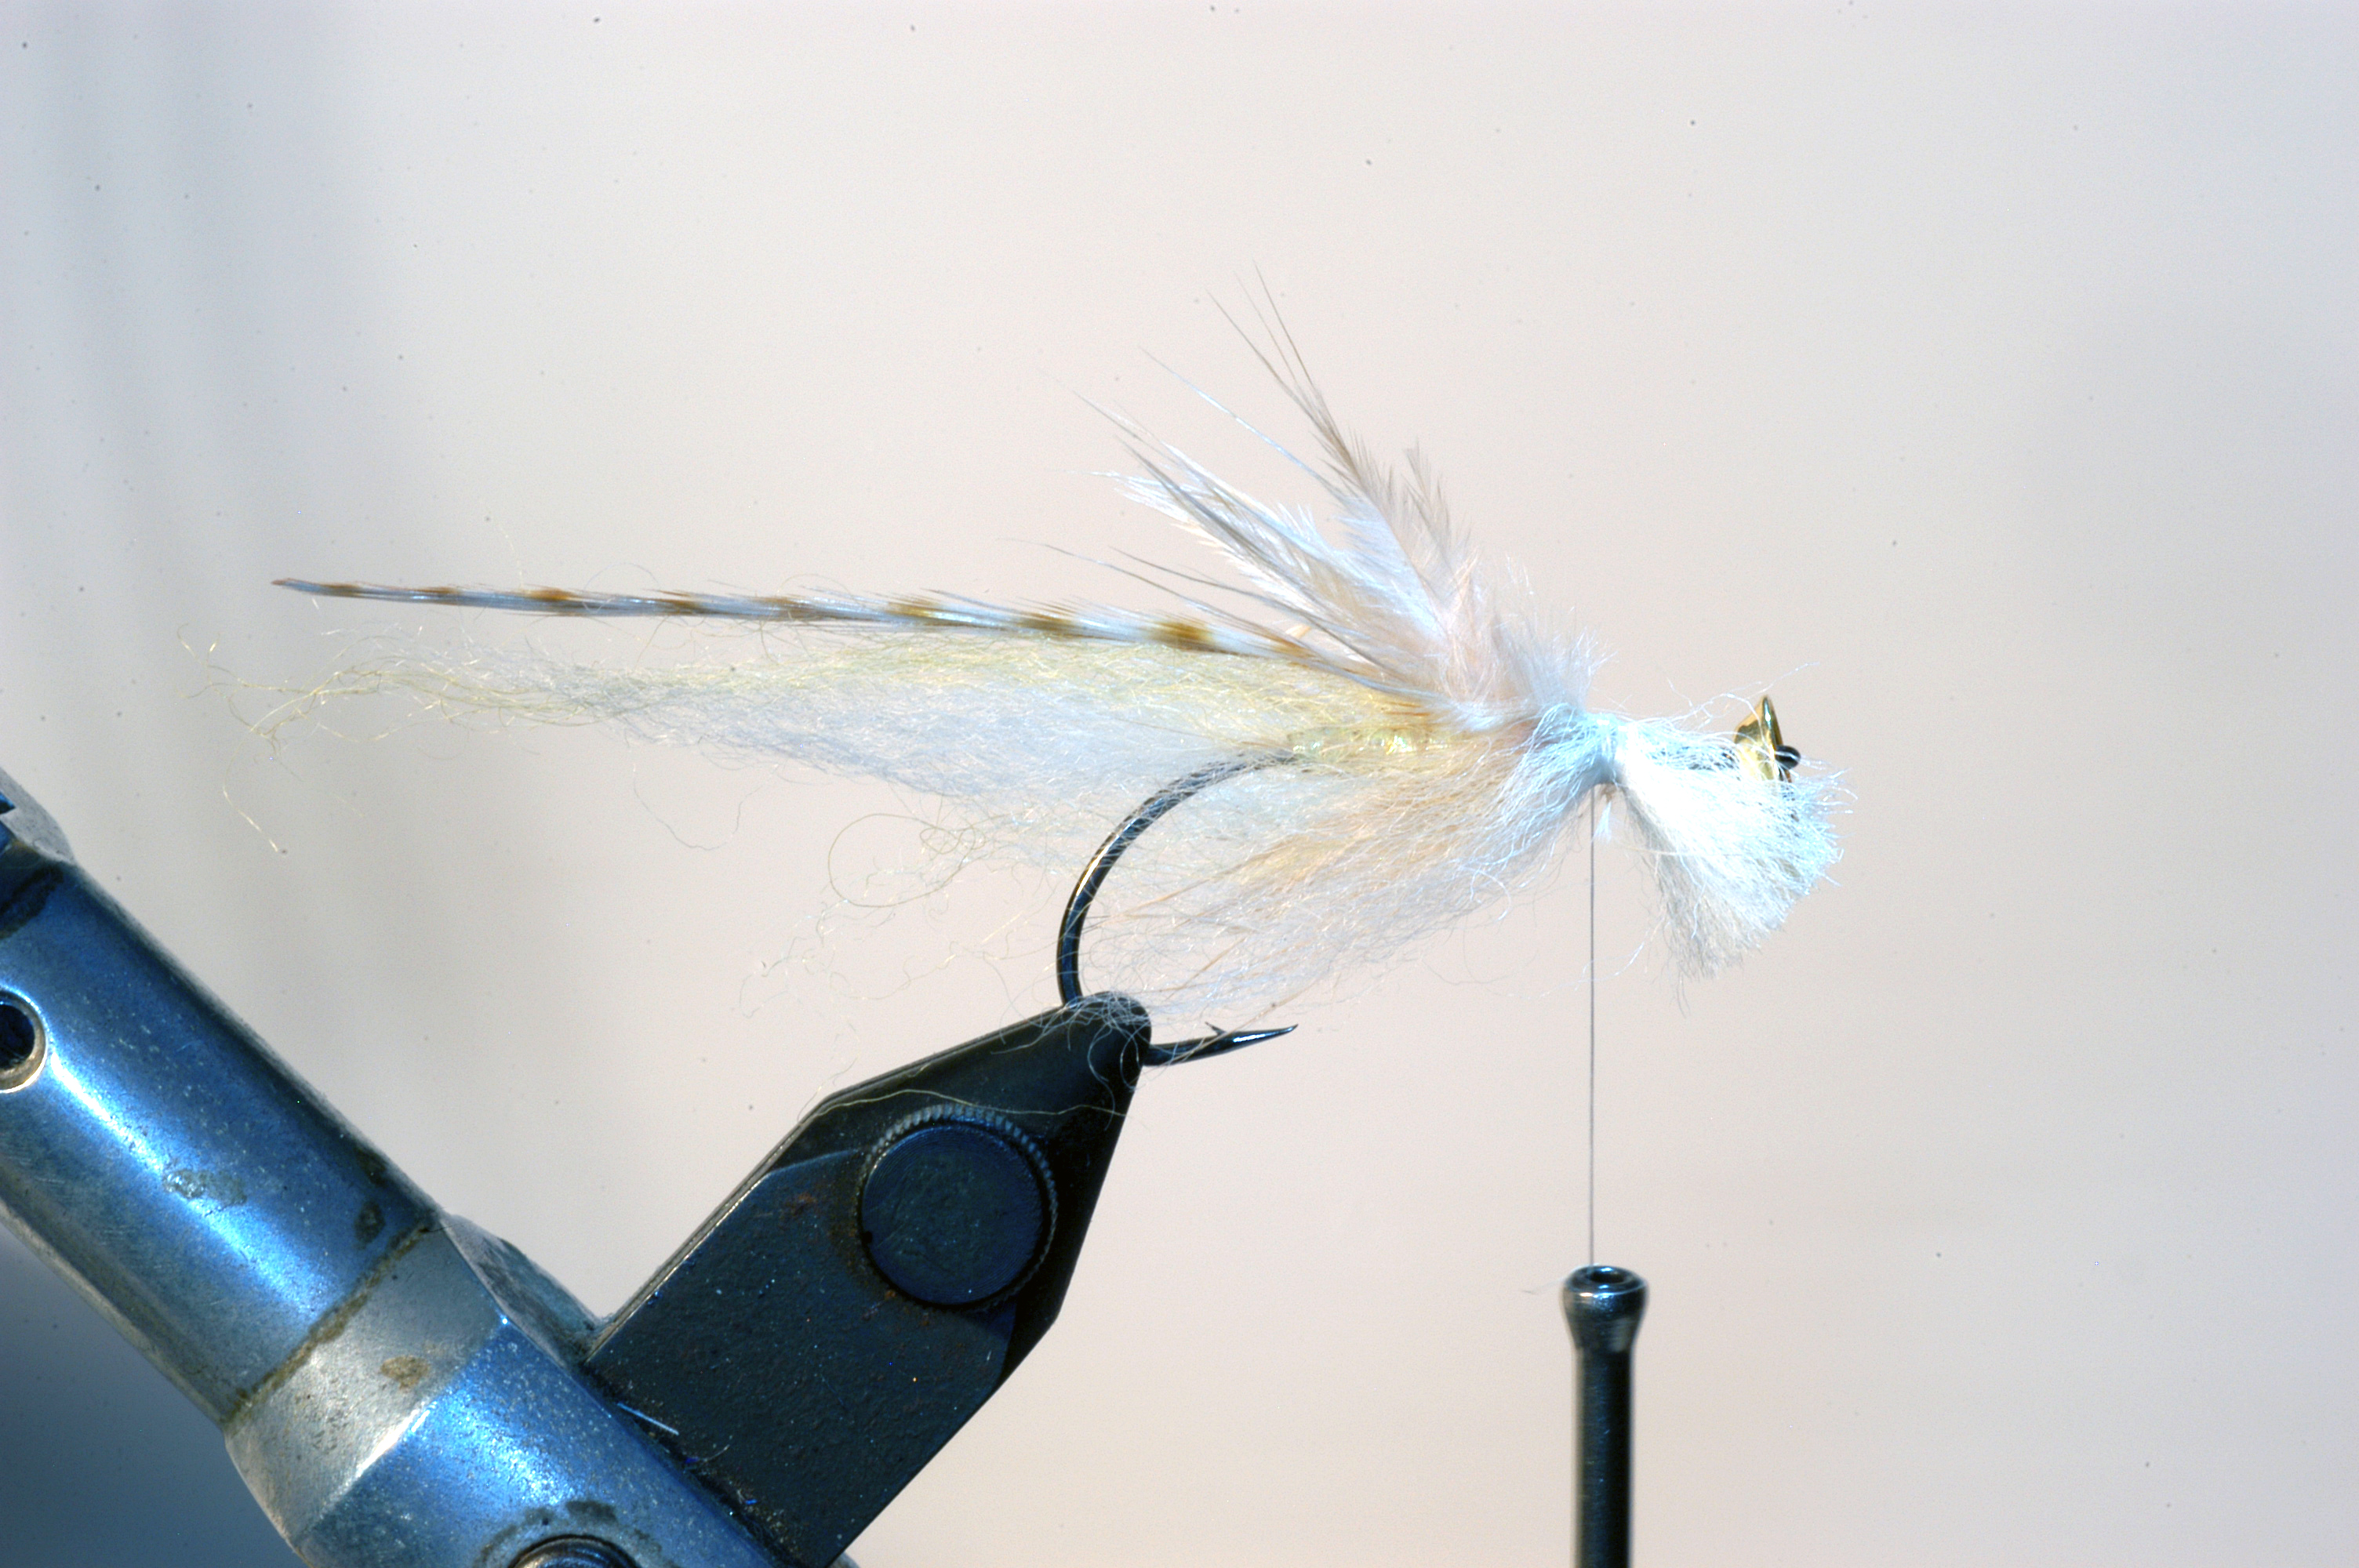
8.) Start tying in the belly bunch – the tips of the bunch should reach backwards and reach app to the bend of the hook.
9.) Tie in the bunches on the sides – again tips backwards and reaching app to the hook bend.
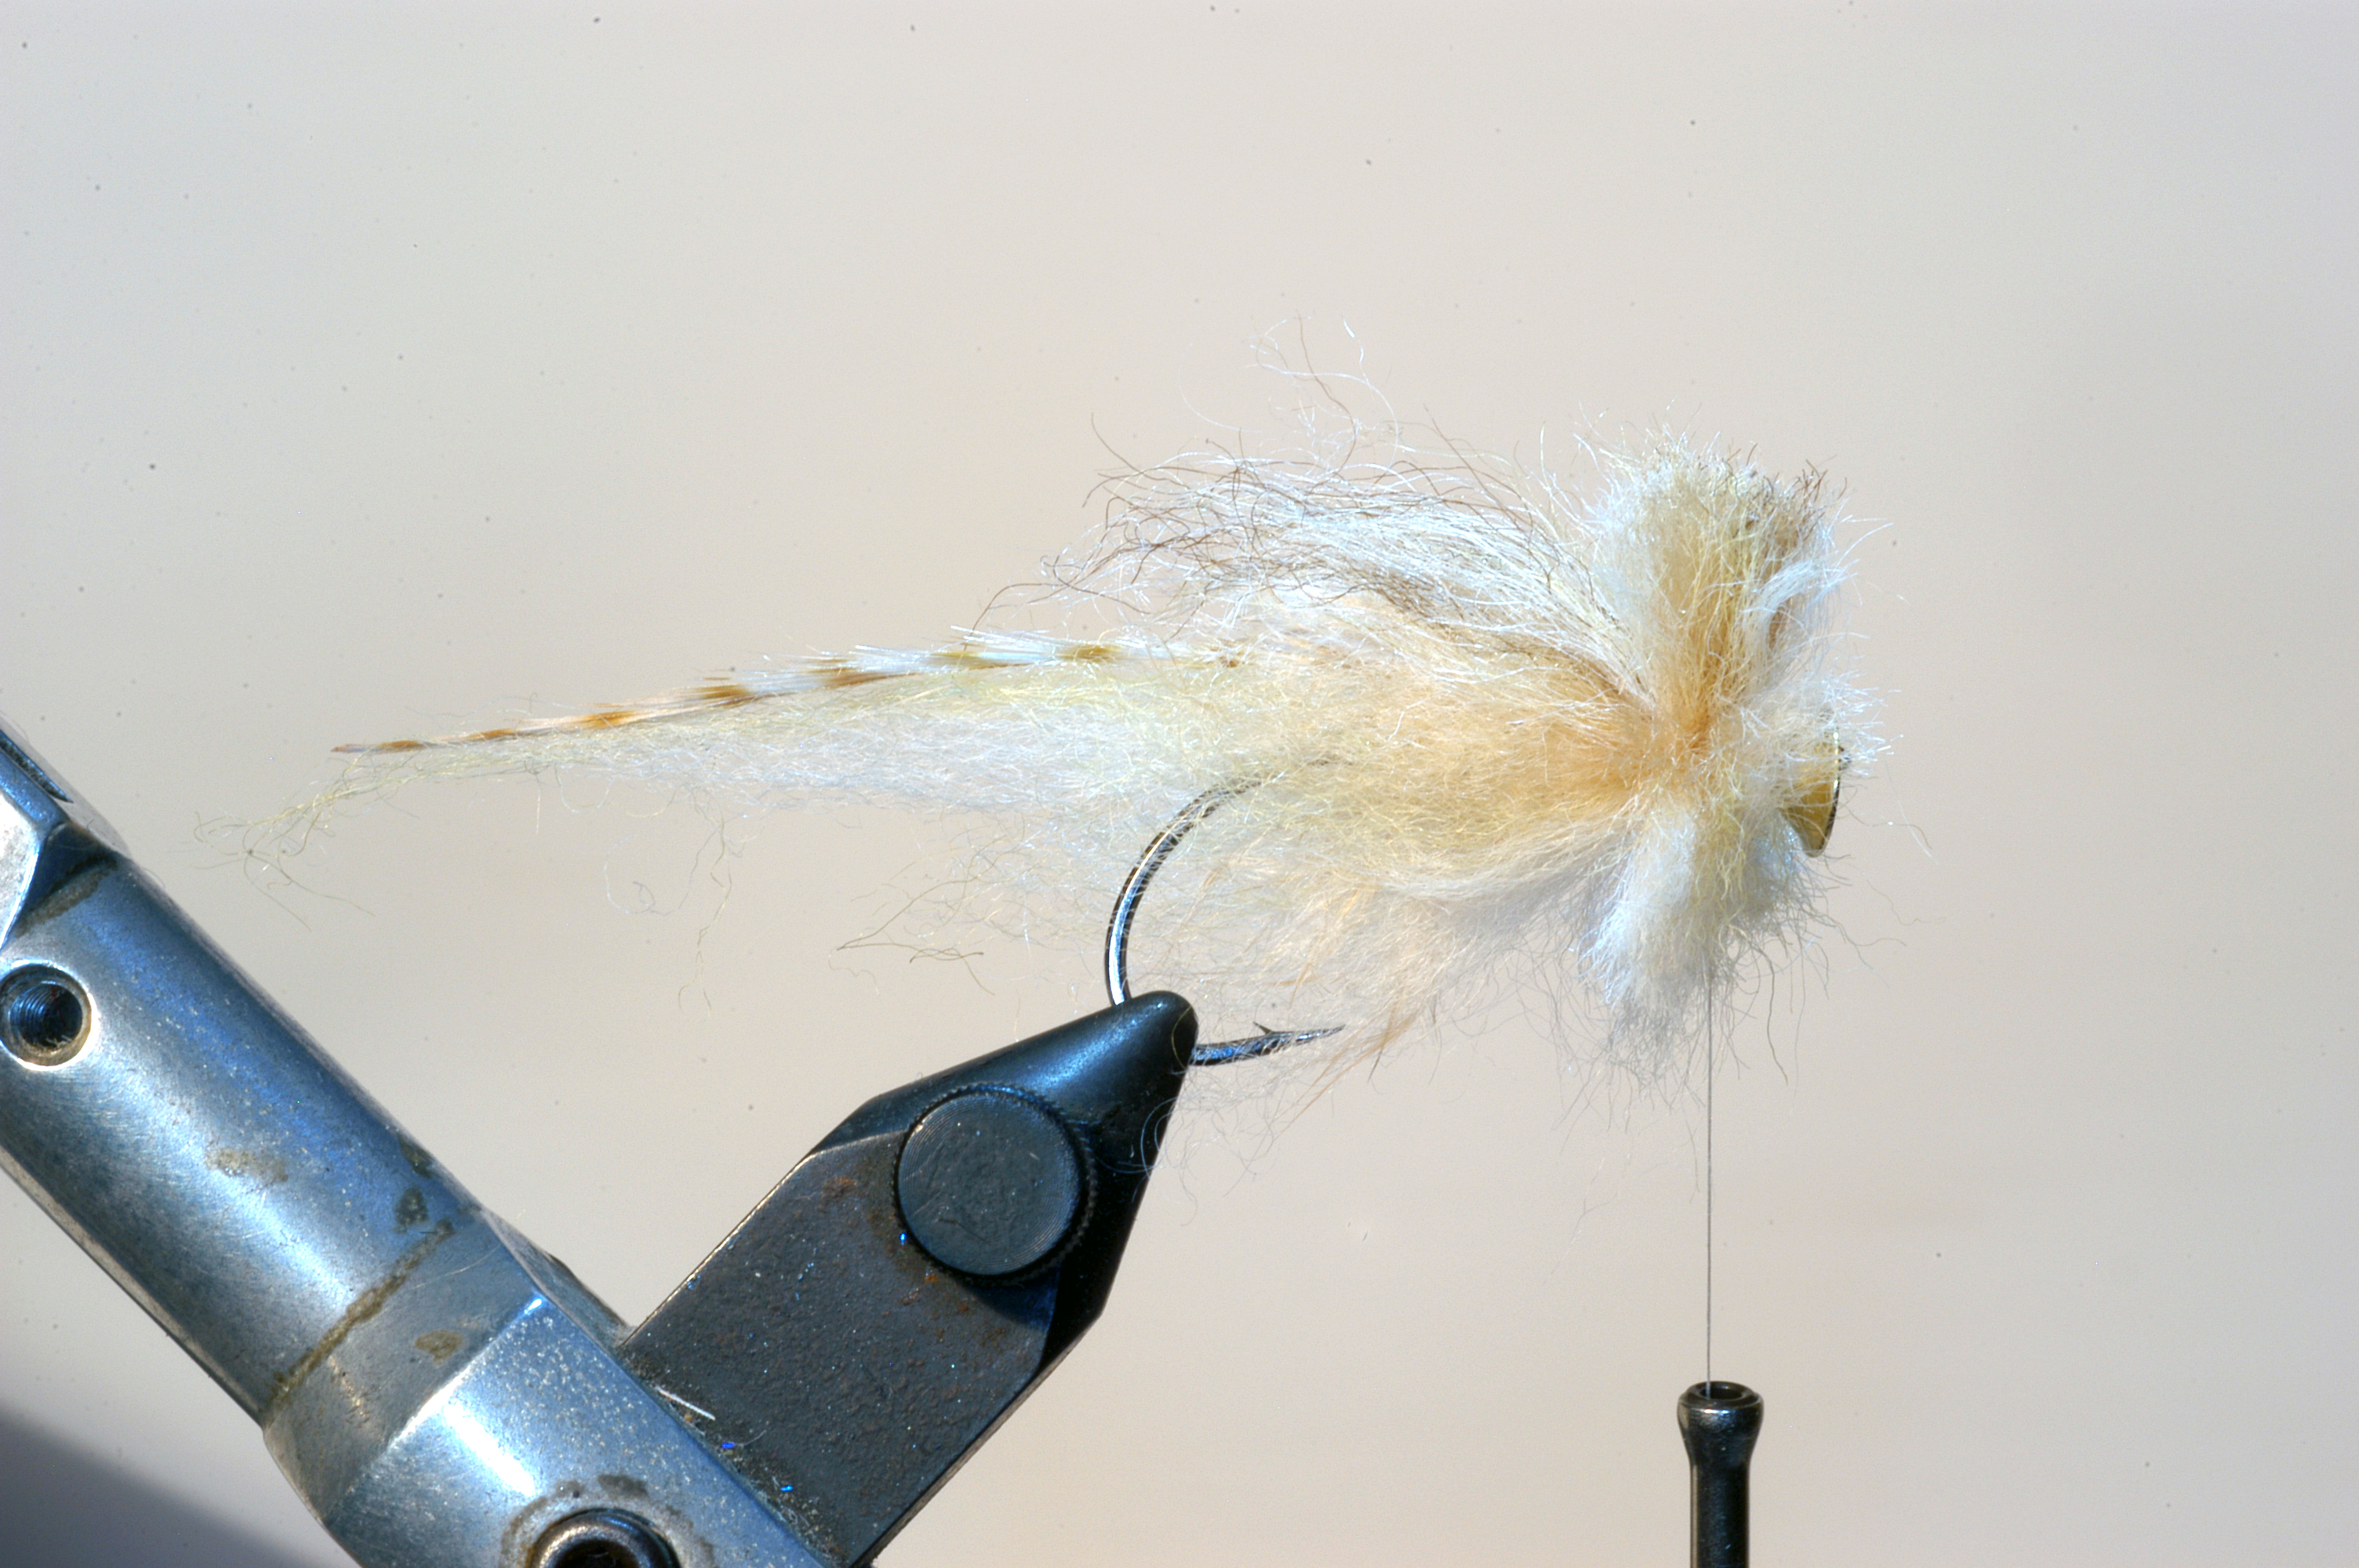
10.) Tie in the top bunch – tips backwards and reaching the hook bend.

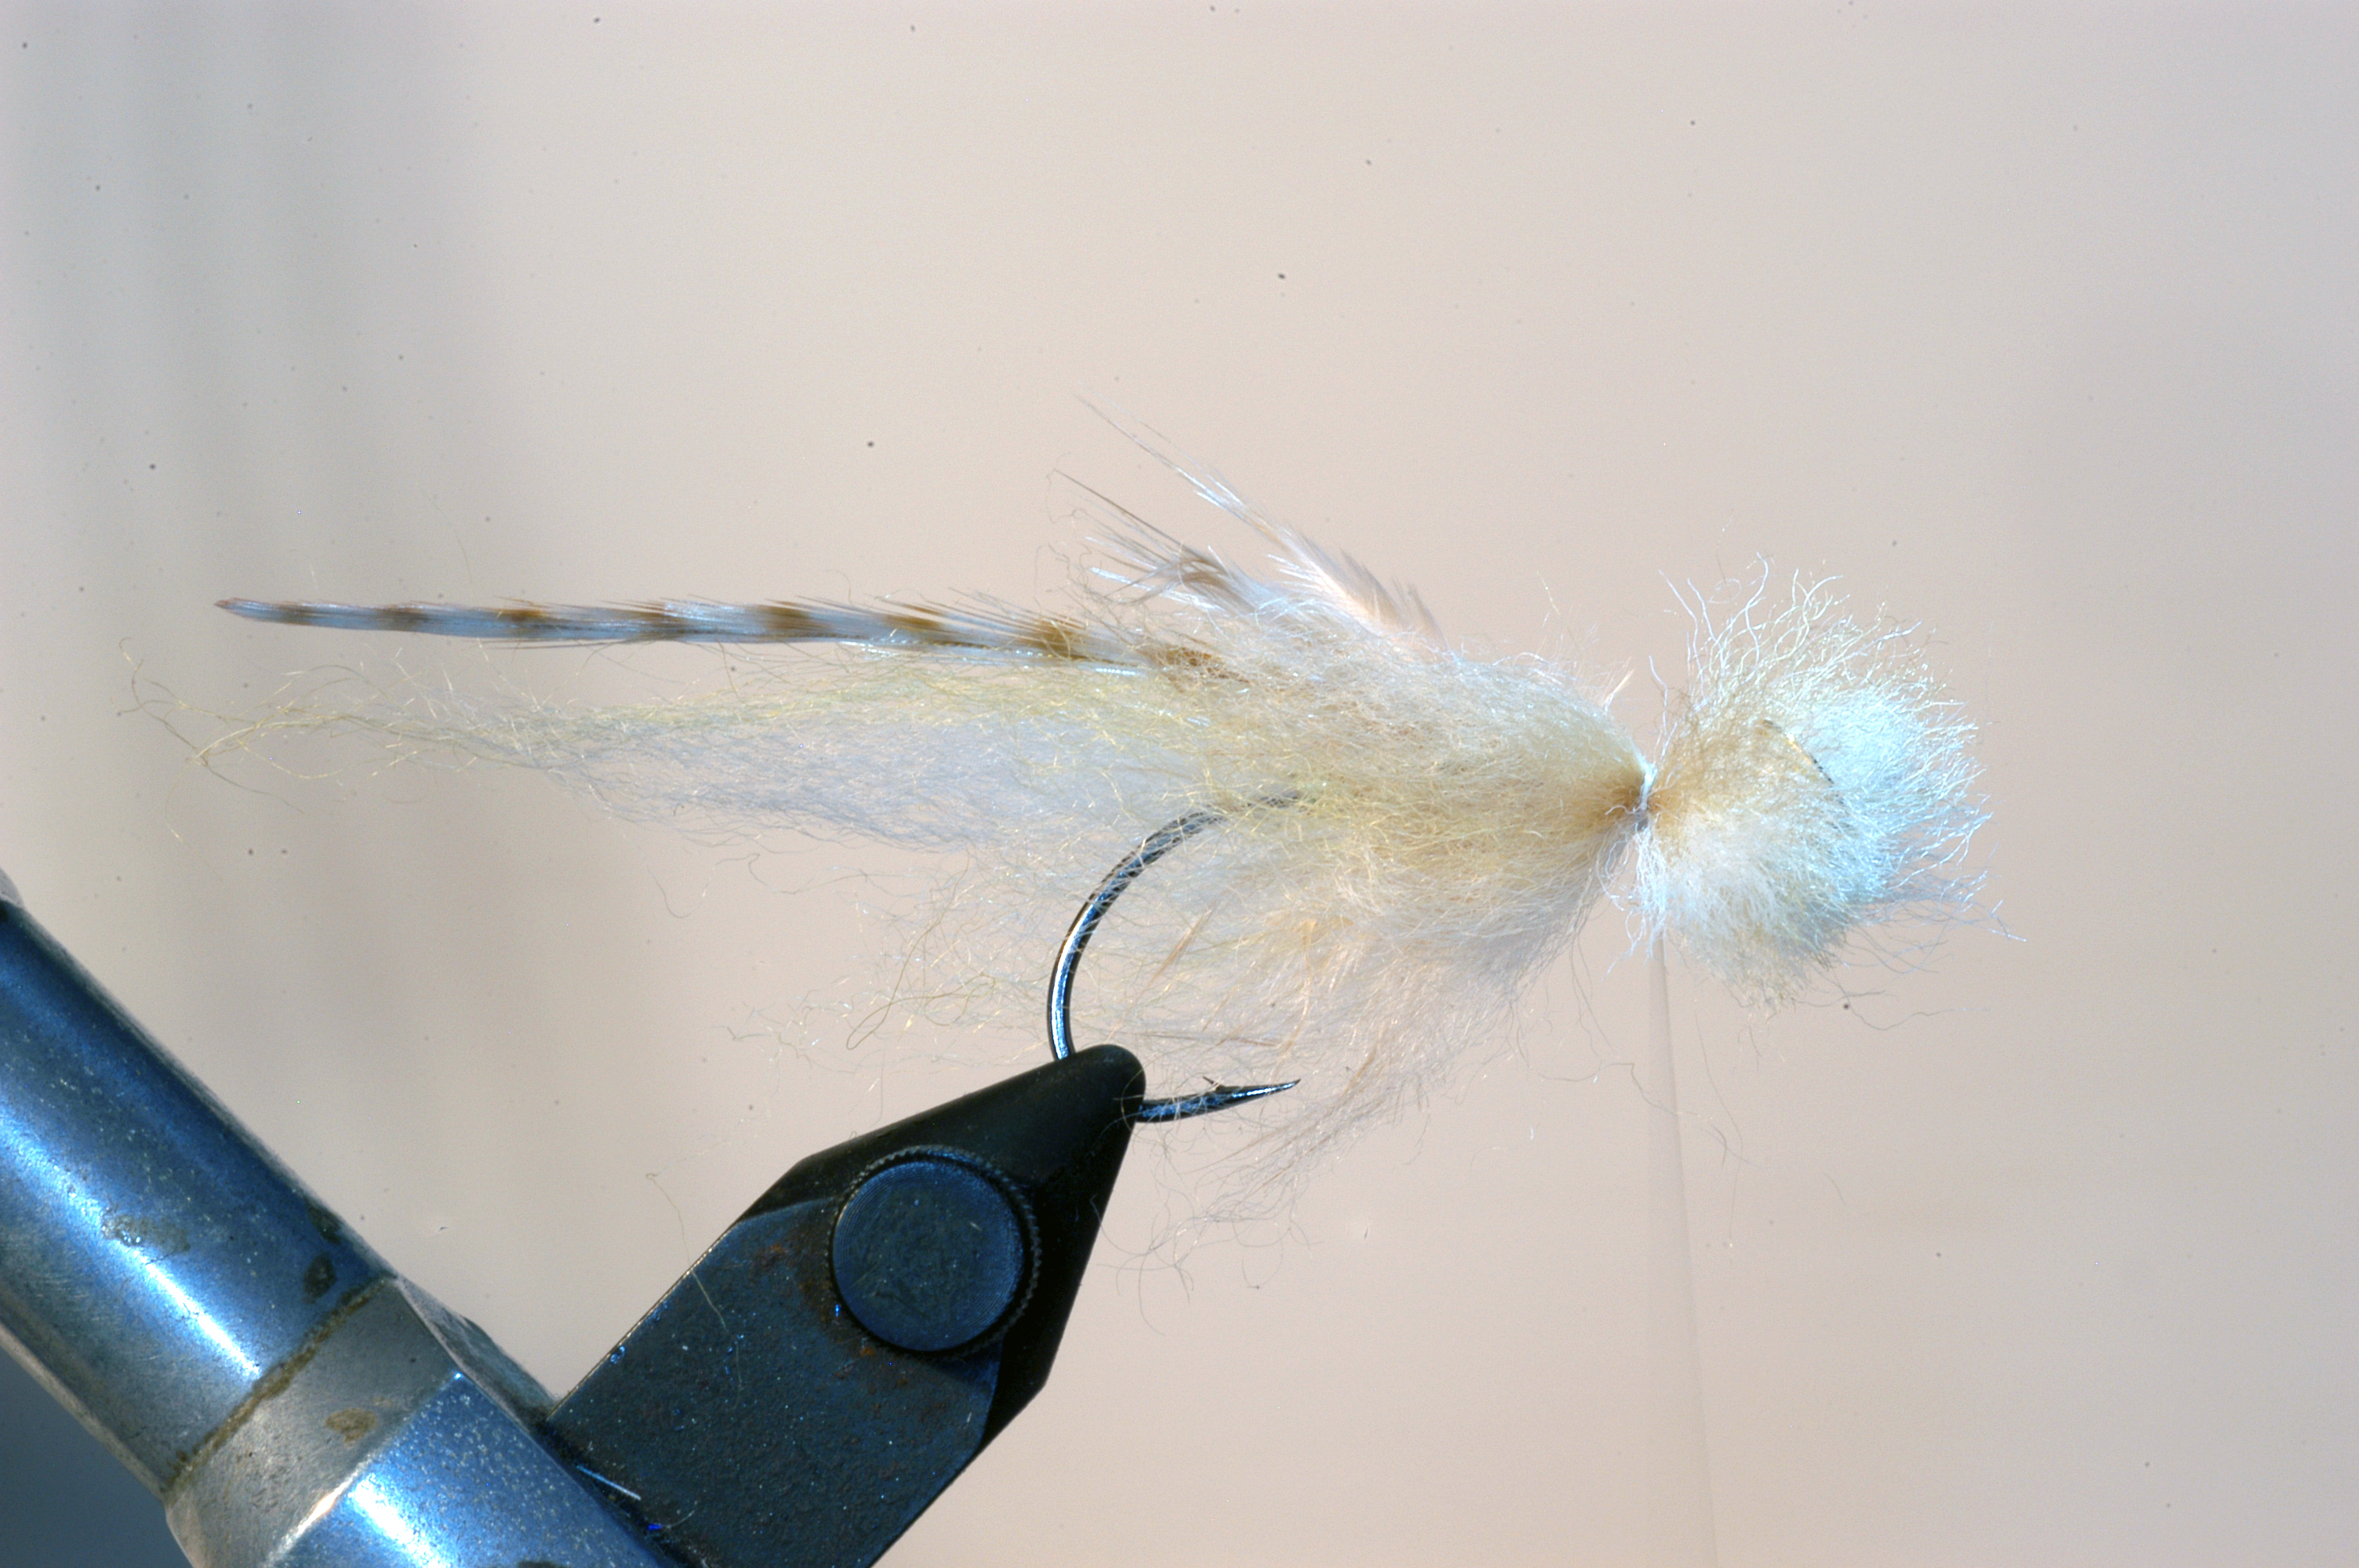
11.) Take a little of the sculpin wool mix used for the sides and dub a little to the thread. This is to really secure the disc I position.

12.) Take a little of the sculpin wool mix used for the sides and dub a little to the thread. This is to really secure the disc I position.
13.) Tie in the dubbing tightly just behind the disc so it sits firm. Tie off with a couple of whipfinish knots.

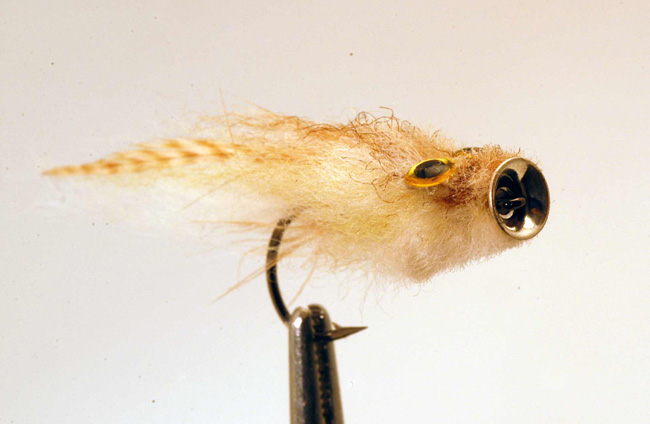
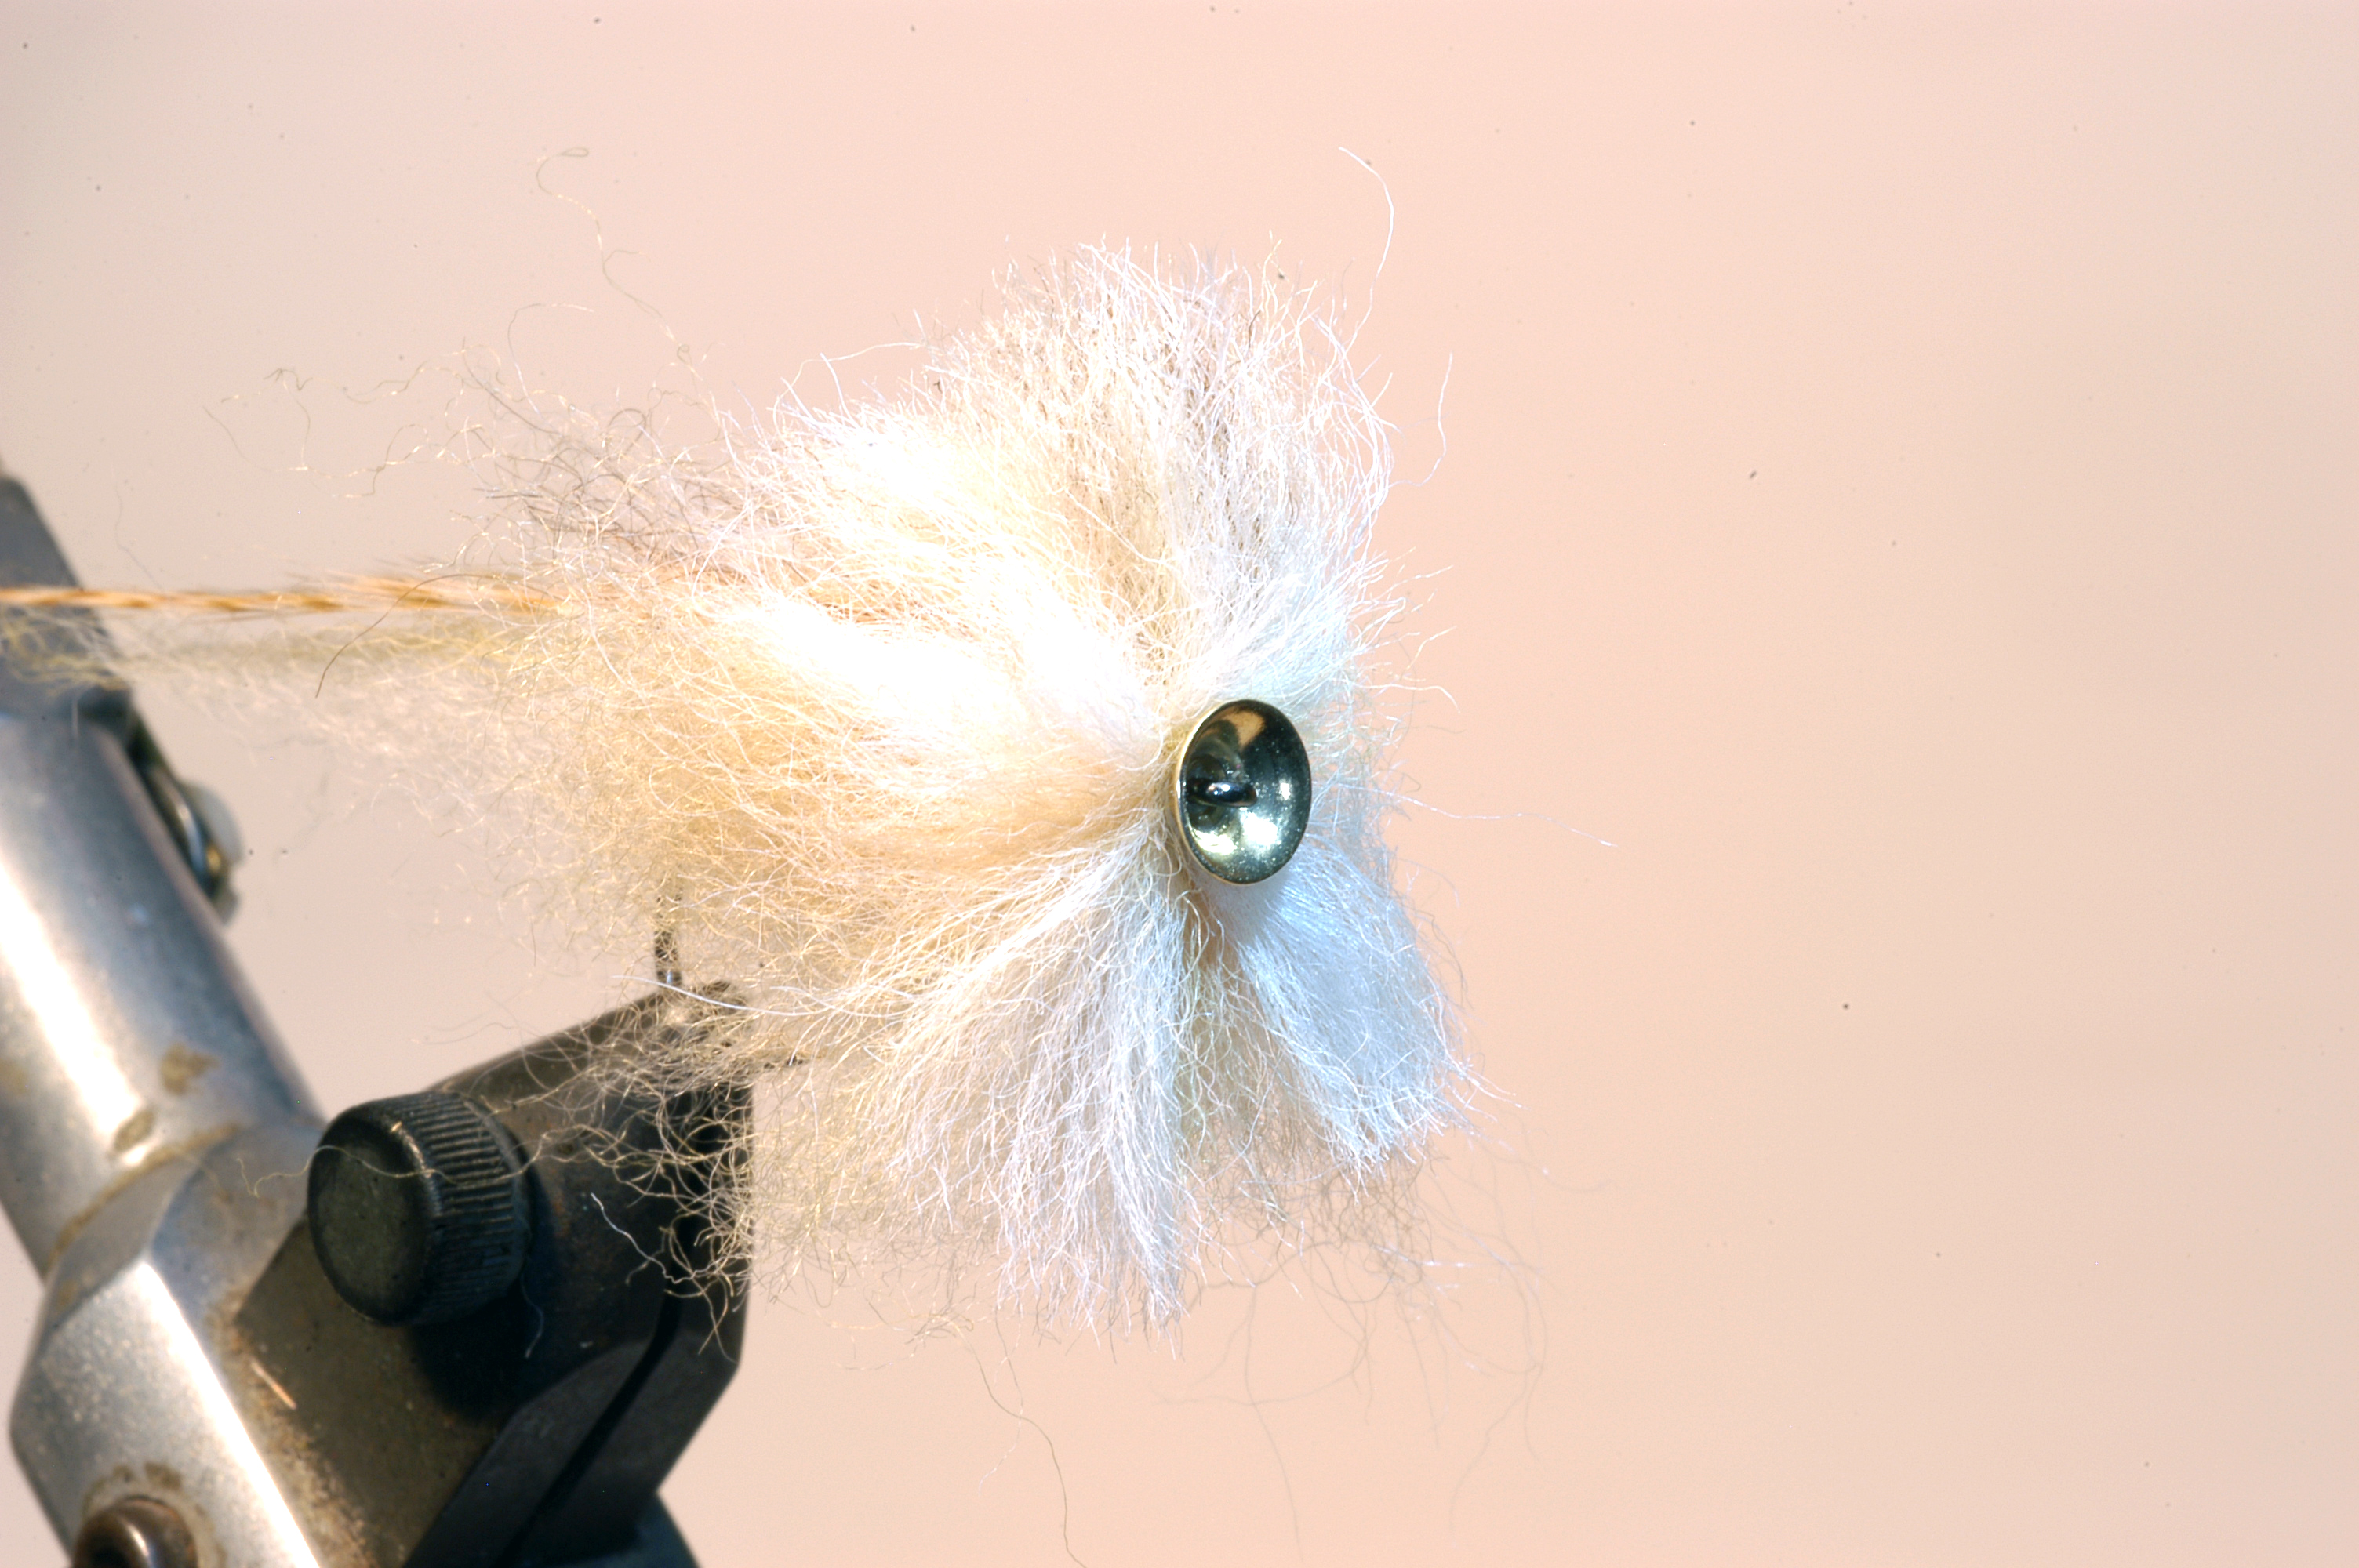
14.) Cut the head in shape.
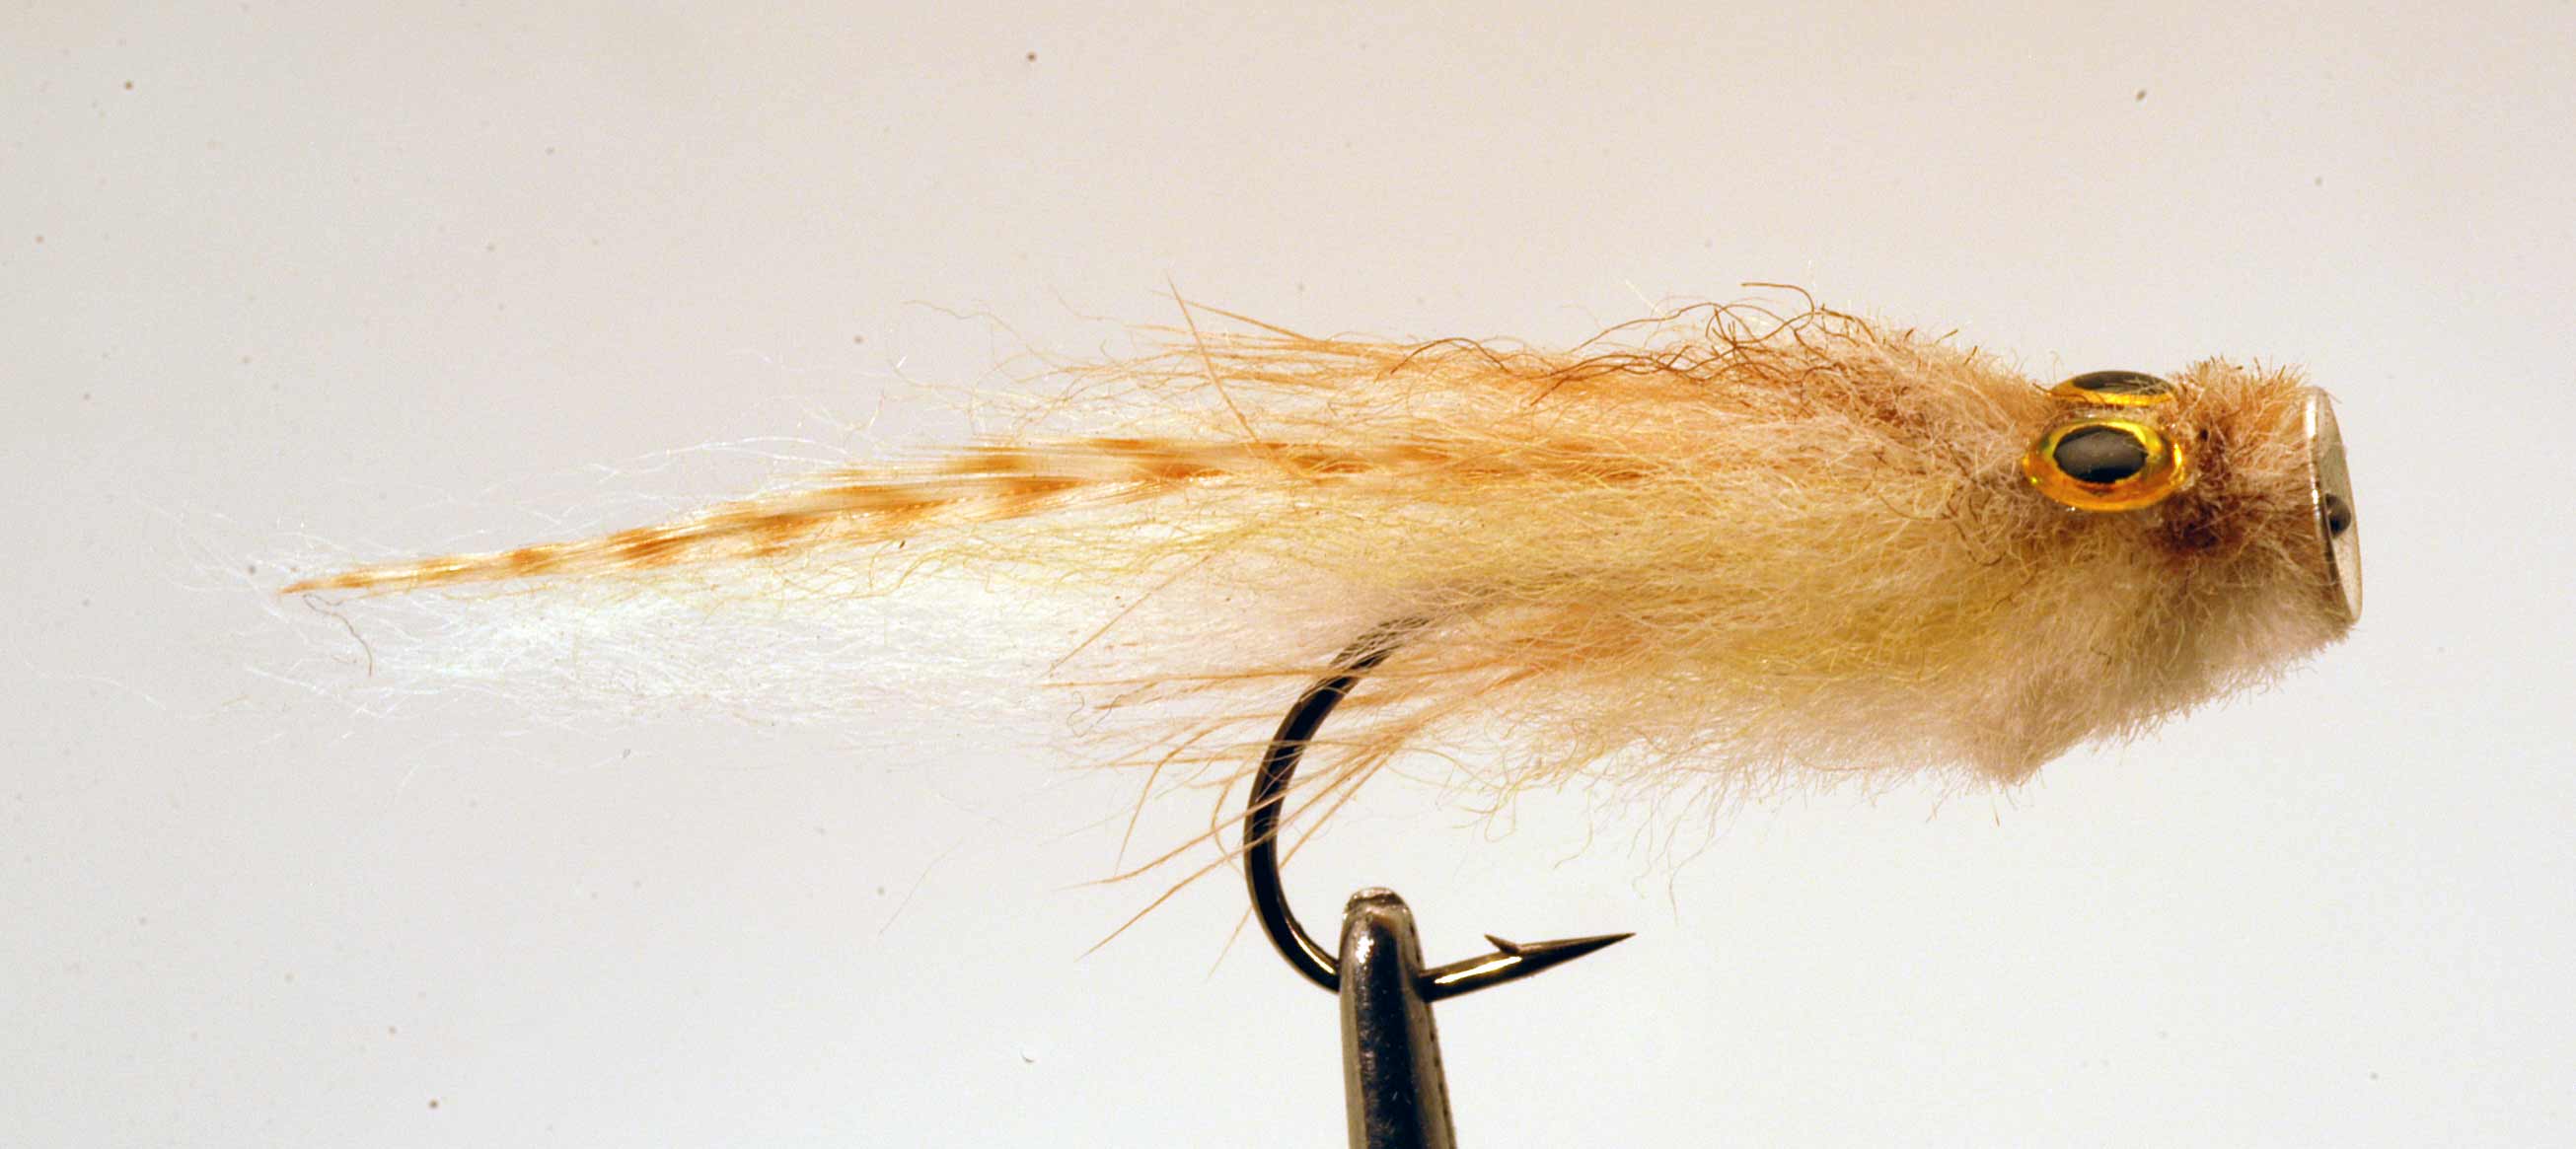
15a.) Glue a couple of 3D eyes to fly.

15b.) Your Megamouth is ready.
Notes:
It is important to tie the fly on a straight eyes hook, as the disc has a tendency to tilt when using an up or down turned eye. A tilted disc can be effective; especially for getting it working in the surface, but know that often the fly will twist rather than wiggle.
I like to mix the colors of the sculpin wool to get the colors I desire. You can of course, just make the head white and then color with pantone pens – possibly just as good and certainly easier – but I like the entire hair to be of the color I seek – that gives more depth to the coloring, especially when the fly gets wet and more transparent.
About Henrik Agerskov Jensen:
Henrik comes from Denmark and has been tying his own flies since childhood. He tied flies professionally for some years and earned his PhD in Biology, but stopped after his graduation. Now he just loves to “play with materials” trying to make new patterns that actually work….
When not tying flies or fishing, Henrik puts his passion into his company called A.Jensen Fly Fishing, a Danish fly fishing brand.
A.Jensen is one of the fastest growing fly fishing brands in Europe and is today active in more than 35 countries. The brand has just begun to enter the US market due to a growing interest in their specialized products for saltwater and Northern pike fly fishing. Be sure to check out the acclaimed daVinci reel.
Check it all out on their website at www.AJensenFlyFishing.com. In 2014, AJensen strives to give you products especially designed for the United States’ great saltwater and musky fly fishing applications.
Sponsored

What exactly is that action disk? Is there a brand name?
Pro Sportfisher work well. Henrik will be selling tungsten version soon as well.