

Thread handling basics, part 1: Starting your thread
By Steve Hudson
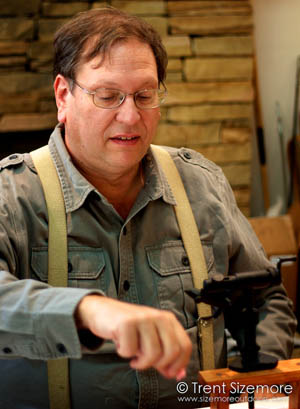
Steve at the bench tying at a North Georgia fly shop. Note: Trent Sizemore image.
[dropcap]O[/dropcap]ne thing that overwhelms many beginning fly tyers is the number of things that must be mastered. Tying in materials… proportioning bodies… dubbing… winding hackle… the list goes on and on.
But the most important basic skill may be the simple matter of managing thread.
Mastering the “thread” portion of fly tying requires consideration of several things. We’ve already talked about the bobbin and about the matter of selecting the right thread. Now we’ll take a look at one of the fundamental tying skills you’ll need to master — the fine art of starting the thread onto the hook.
Quick review: how to hold the bobbin
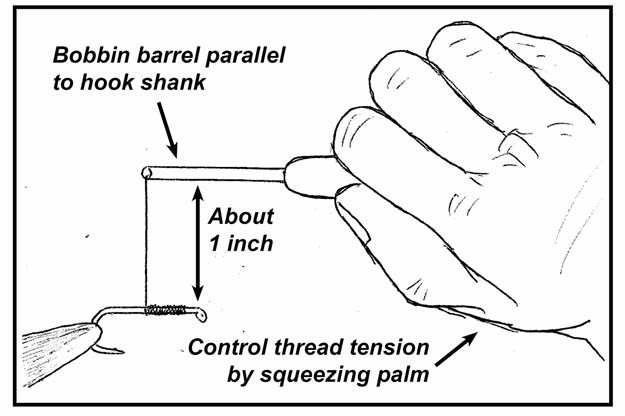
Take a moment and review the right way to hold a bobbin. The spool should rest in the palm of your hand (your right hand, if you’re a right-handed tyer). That allows you to grip the bobbin’s “collar between thumb and index finger. The barrel will stick out from between your thumb and index finger, as shown. This will give you an excellent feel for the thread, and you can control thread tension by slightly squeezing your palm onto the spool.
Remember to always hold the bobbin so that its barrel is parallel to the hook shank.
But first…
Before you can do anything with thread, you’ve got to put the tying hook in your vise. A properly mounted hook makes the “thread” part of things much easier to handle. The hook should be mounted so that the jaws of the vise grip the back of the bend of the hook, as shown. That gives your vise the most solid grip possible.
When mounting that hook, make sure that the hook shank is horizontal (that is, not tilted upwards or downwards). A non-level hook can cause the thread to slide along the hook’s shank, and that’s a real pain when you’re trying to start thread or tie in a material. The illustration shows how your hook should be mounted.
And now…Thread skill 1: Starting the thread on the hook
The skill that fly tyers refer to as “starting the thread” is one of the most important fly tying fundamentals. Here’s how it’s done.
First, mount the hook and thread the bobbin. Pull out about six inches of thread from the end of the bobbin’s barrel.
Next, assuming that you are right handed, hold the free end of the thread in your left hand with the bobbin positioned in your right hand. Then lay the thread over the top of the hook shank so that your left hand (the one holding the end of the thread) is on the near side of the hook (closest to your body) while your right hand (the one holding the bobbin) is on the far side (that is, the side away from your body). For best thread control, you want to have about an inch of thread between the tip of the bobbin barrel and the shank of the hook.
Now, while holding the end of the thread, wrap two close-spaced turns of thread around the hook shank, working toward the front (eye) end of the hook.
Then, still securely holding the tag end of the thread, make three or four additional turns – only this time you’re wrapping toward the rear (bend) of the hook. In other words, you’re wrapping back over the first two turns that you made.
 These wraps should be nice and snug – don’t let the thread go slack!
At that point (and as long as the thread does not go slack) your thread should be securely anchored to the hook. You have “started the thread” and are well on your way to tying a fly.
Once the thread is secured, let the bobbin hang free (but don’t let it go slack and lose tension!) and use your scissors to cut the free end of the thread close to the hook. Be careful not to accidentally cut the working thread! One good way to avoid cutting the main thread is to pull the tag end upwards (so it is above the hook,) with the bobbin hanging down below the hook. Then use your scissors above the hook, essentially laying them on the hook shank as you cut the tag end while the working thread hangs safely out of the way below.
At this point, your thread is anchored to the hook by four or five turns. That’s all it takes as long as you don’t let the thread go slack. Will those turns hold? Indeed they will, and you can prove it by pulling on the thread. The hook will bend, and the thread may break, but the thread won’t slip as long as you maintain tension.
In tying classes, students are always amazed by how well just a few turns of thread will hold.
What happens if you let the thread go slack at this point? Try it and see!
In any case, after you’ve got the thread started and the tag end trimmed away, continue wrapping the thread toward the rear of the hook to the first material tie-in point. That’s almost always going to be at the back end of the shank, just where the shank begins to bend. On many hooks, that will be even with the barb. Some tying recipes may tell you to position the thread at some other point, but in most cases, if you wind to the bend you’ll be perfectly positioned for adding the first materials and for beginning to tie your fly.
Between now and next time, practice starting thread on a variety of different sizes and styles of hooks. That will get you ready for what we’ll look at next – the all-important matter of tying materials to the hook.
NEXT: Tying materials to the hook
This series is based on the book A STRUCTURED COURSE IN FLY TYING, published by Chattahoochee Media and available from many fly shops, from Amazon, or direct from the author
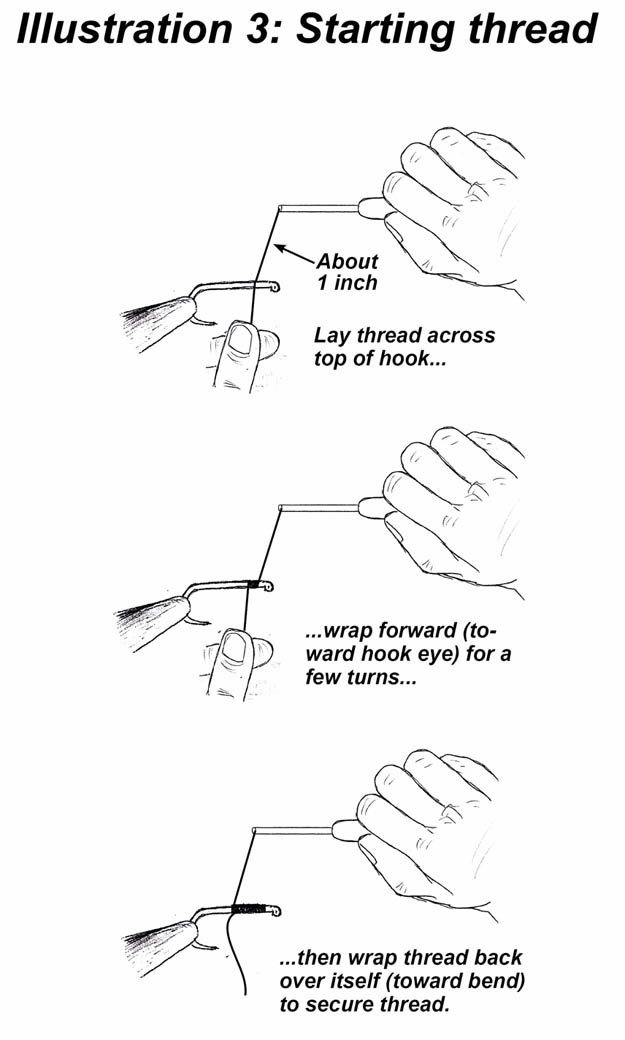
How to start thread on a hook.
You may want to get a copy to reference as you go through the course, for it covers many areas in more detail than we can here.
A complete kit of all tying materials needed to tie each of the flies covered in this course (as well as additional patterns covered in the book) is also available. It can be purchased directly from Chattahoochee Media by visiting the webstore.
About the author:
Steve Hudson has enjoyed fly tying and fly fishing for many years and has taught thousands of people to tie flies. An award-winning outdoor writer and illustrator, he has written extensively about fly fishing, fly tying, hiking, travel and outdoor recreation, with numerous magazine articles and more than 20 books to his credit. He lives in North Georgia.
Sponsored