
A Guide to Capturing Great Fish Shots
By Jack Scrine
More and more, fishing is becoming a sport defined by photography. We anglers love our photos, whether we want proof we actually did catch that big trophy trout, a positive way to enjoy an outdoor pastime while respecting the environment, or just bragging rights. Whether you are a sponsored fishing journalist who relies on pictures for a living and shoots with a powerful DSLR or a hobbyist with nothing more than a small point-and-shoot or a smartphone to record your angling memories, there’s a chance you’ve screwed up many photos of your prized catches throughout your angling adventures. While you may have chalked up your poor photos to the many challenging conditions that can present themselves while fishing, you could get better photos by following a few simple tricks.
A Healthy Fish Makes a Great Photo
One huge reason for the importance of fishing photos is due to increasing popularity of catch-and-release fishing. Cameras give us the luxury of quickly photographing our catch and releasing it to fight another day. Even if you plan to take home your catch and eat it (and there’s nothing wrong with that!), your photos will look better if you photograph your fish while it is alive and wet and while you are still on the water. I don’t want to see photos of a bloke holding a beautiful fish by its sliced and bloody gills in his backyard hours after the trip. Take your pictures as though you are going to release your fish, even if you aren’t. If you are, these tips will give your catch a better chance of swimming away healthily after your photo shoot!
Be Prepared
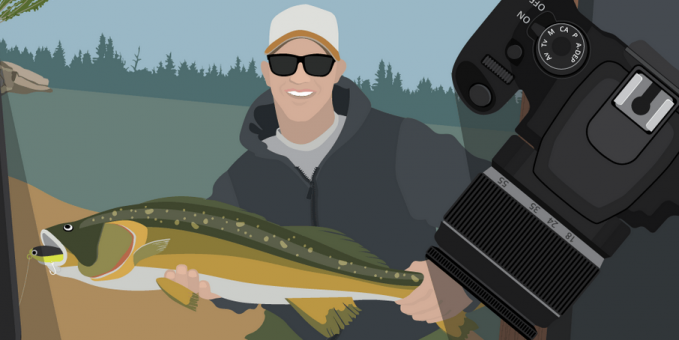
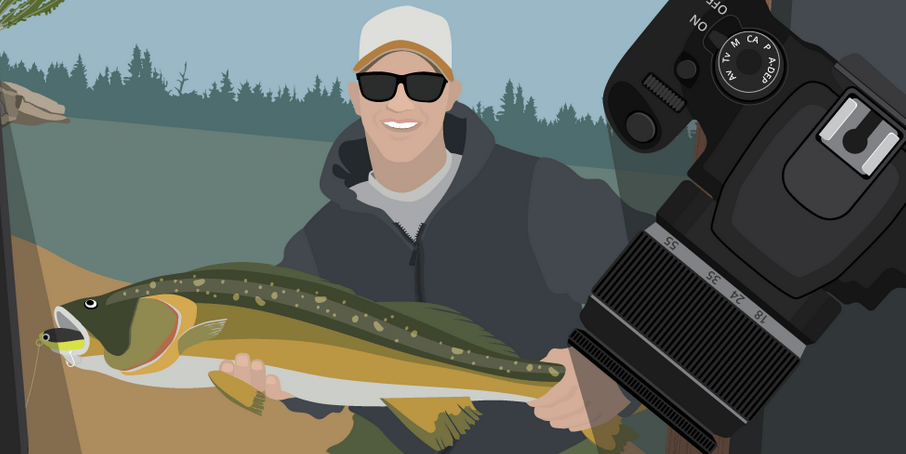
Have your camera ready to go before you land the fish. Whether you get your fishing partner to grab your cell phone out of your pocket as you fight the fish or set up your DSLR to the right calibration, you’ll get better photos if you don’t have to mess around with preparing your gear with a writhing fish on the deck or dock. When using a DSLR, I find the AV or aperture priority mode is a great, quick go-to for on-the-water, still fishing photos, while the TV or shutter speed priority mode is great for action shots.
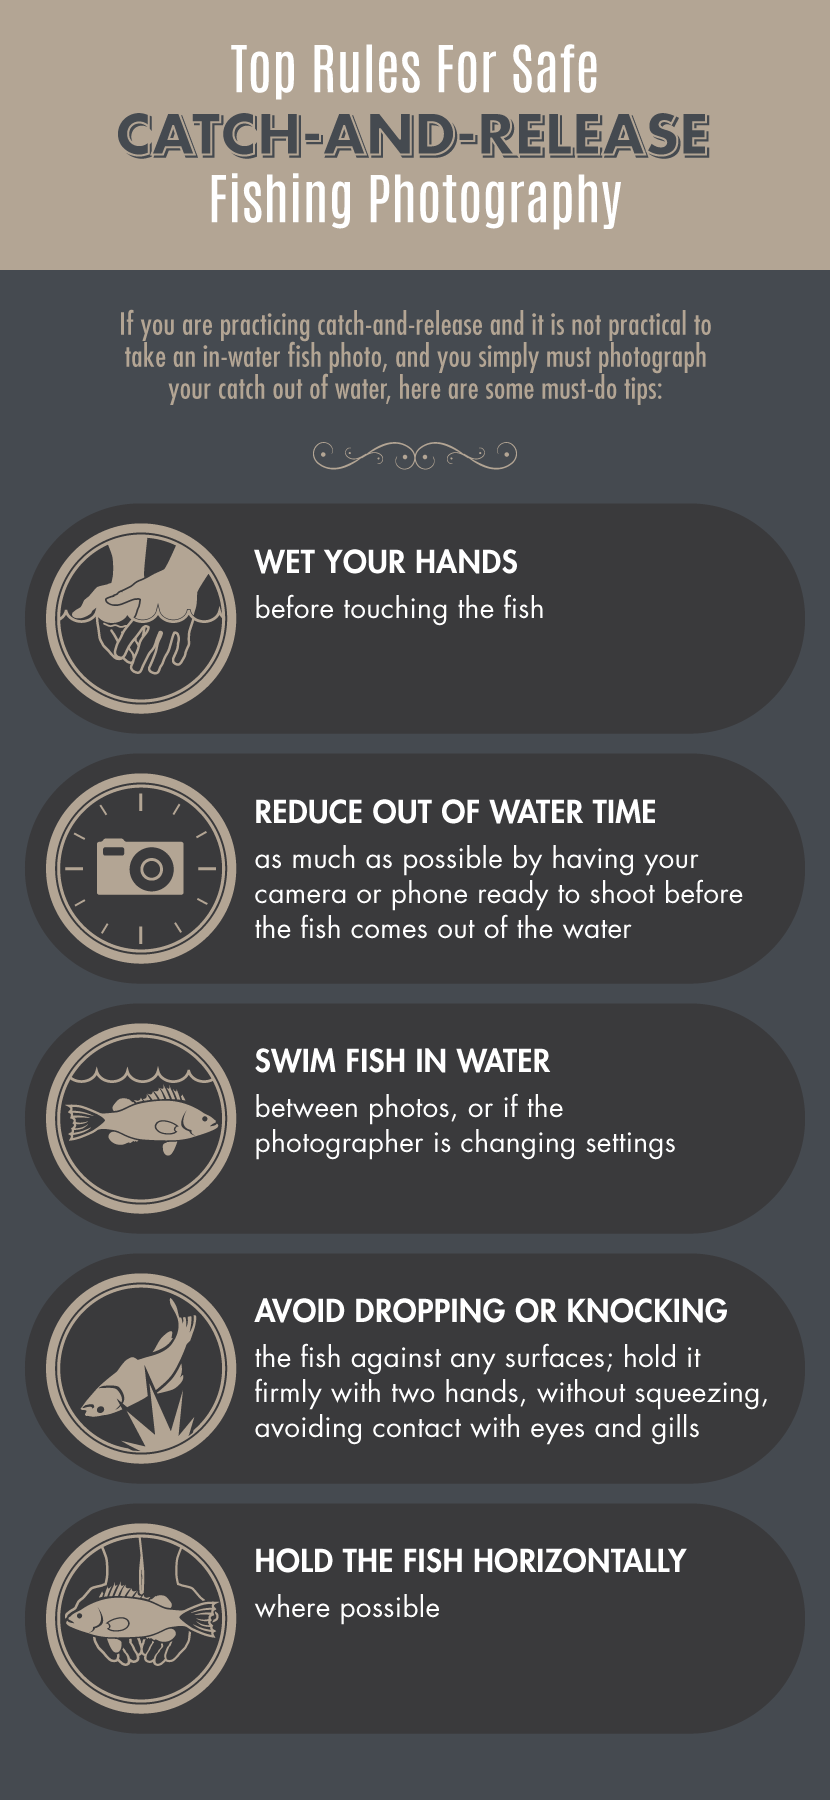
Treat Your Fish Well
Wet your hands before touching the fish. This will help you avoid the risk of infection and damaging the fish’s slimy scale coating if you plan to release it, and it will help the fish look great for the photo shoot. “Swim” your fish between photos by dipping it in the water (with a careful grip), allowing it to revive itself and get a bit of wet, glistening goodness back for the next photo.
Treat the fish as though it’s made of glass! Be gentle; you’ll find the fish is more cooperative when you hold it confidently but gently instead of gripping your hands around it as though you’re trying to choke it. You’ll be less likely to drop it or squeeze the life out of it, which makes for a better-looking fish. In addition, hands tightly squeezing a fish never makes for much of a photo and never says anything good about the angler! It also goes without saying that an un-smashed fish makes for an easier release.
The Comfort Hold
Hold your fish horizontally rather than vertically. Doing so tends to give you a better angle for photographs, which look ugly when a fish is held aloft by its battered, stretched, or slashed gills. Experimentation with angles is encouraged, though, and if you plan on taking a vertical shot, don’t put weight on the fish’s gills and spine. Instead, hold the fish by the tail, with its head supported by your hand and held towards the camera.
Stayin’ Alive
Just in case I wasn’t clear enough on this, don’t take photos of dead fish. There’s nothing unethical about taking a fish home to eat, but dead fish look bad in photos, and they aren’t appealing in any way. They’re often stiff, covered in blood, and battered. They may be easier photographic subjects than their life-filled, squirmy friends, but the results will be terrible.
Don’t Panic!
Be quick but stay calm. Many times a photo of a fish turns out badly because your adrenaline is running high as you frantically try to fight your fish, avoid tangling your line with your partner’s, find your camera, net the fish, celebrate, and then take a photo! In this situation, your first instinct is often to think that any photo will do. Relax! The hard part is over. Swim your fish for a moment while you catch your breath, take a second to gather yourself, and make a game plan. Think about the type of photo you want. It’s easy to forget how much the picture of this fish matters in the thrill and excitement of the moment, so reminding yourself to settle down and concentrate on the serious task of capturing a great photo is very important.
Be Your Friend’s Photographer
When your friend or fishing partner has hooked a fish, you have an opportunity to take photos of the fight, the netting process, them proudly holding their fish, or their face when they lose their fish at the last second! The point is, you’ll never have a better chance to practice your fishing photography than when you don’t have to focus on landing the fish. Don’t sit and watch – pick up the camera and document the experience. You’ll have the benefit of clean, dry, calm, steady hands, and you won’t be distracted. There’s no better time to practice than on someone else’s fish, and they’ll owe you one when you land your next monster!
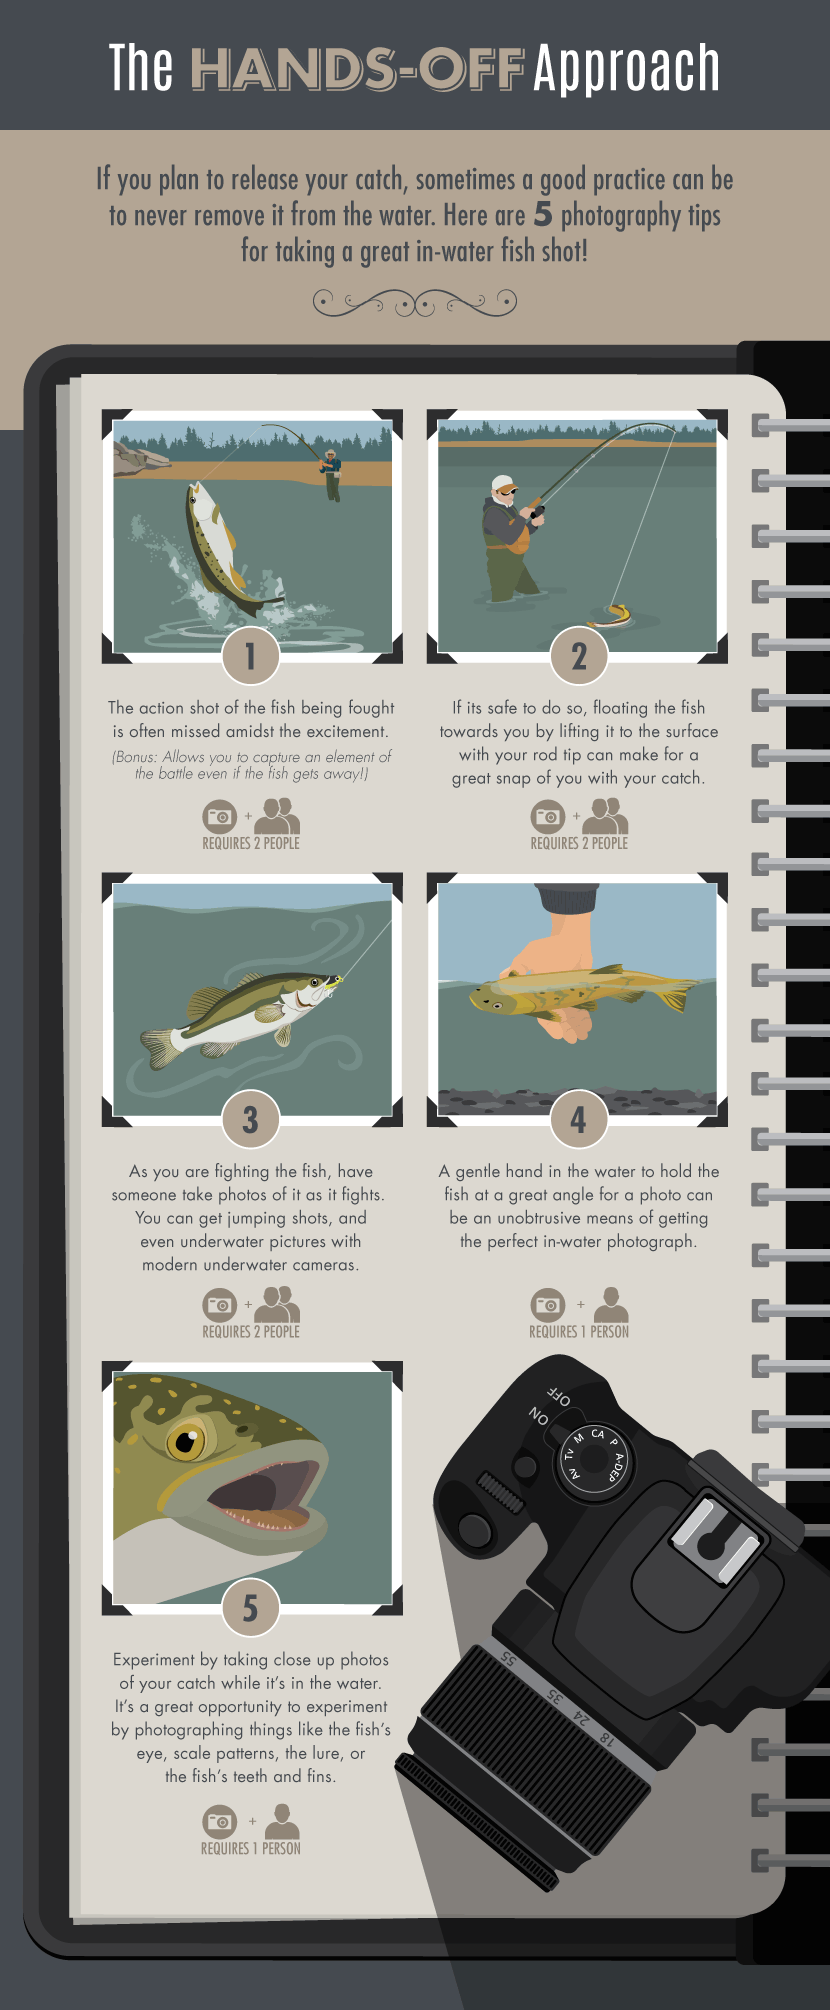
Keep it in the Water
Finally, consider an in-water photo. Your fish will never look better than when it’s fighting on the end of a line, and if you or your partner can get photos of it as it comes to the net, swims alongside the boat, or is released, you’ll have something truly special.
Composing Better Fishing Photos
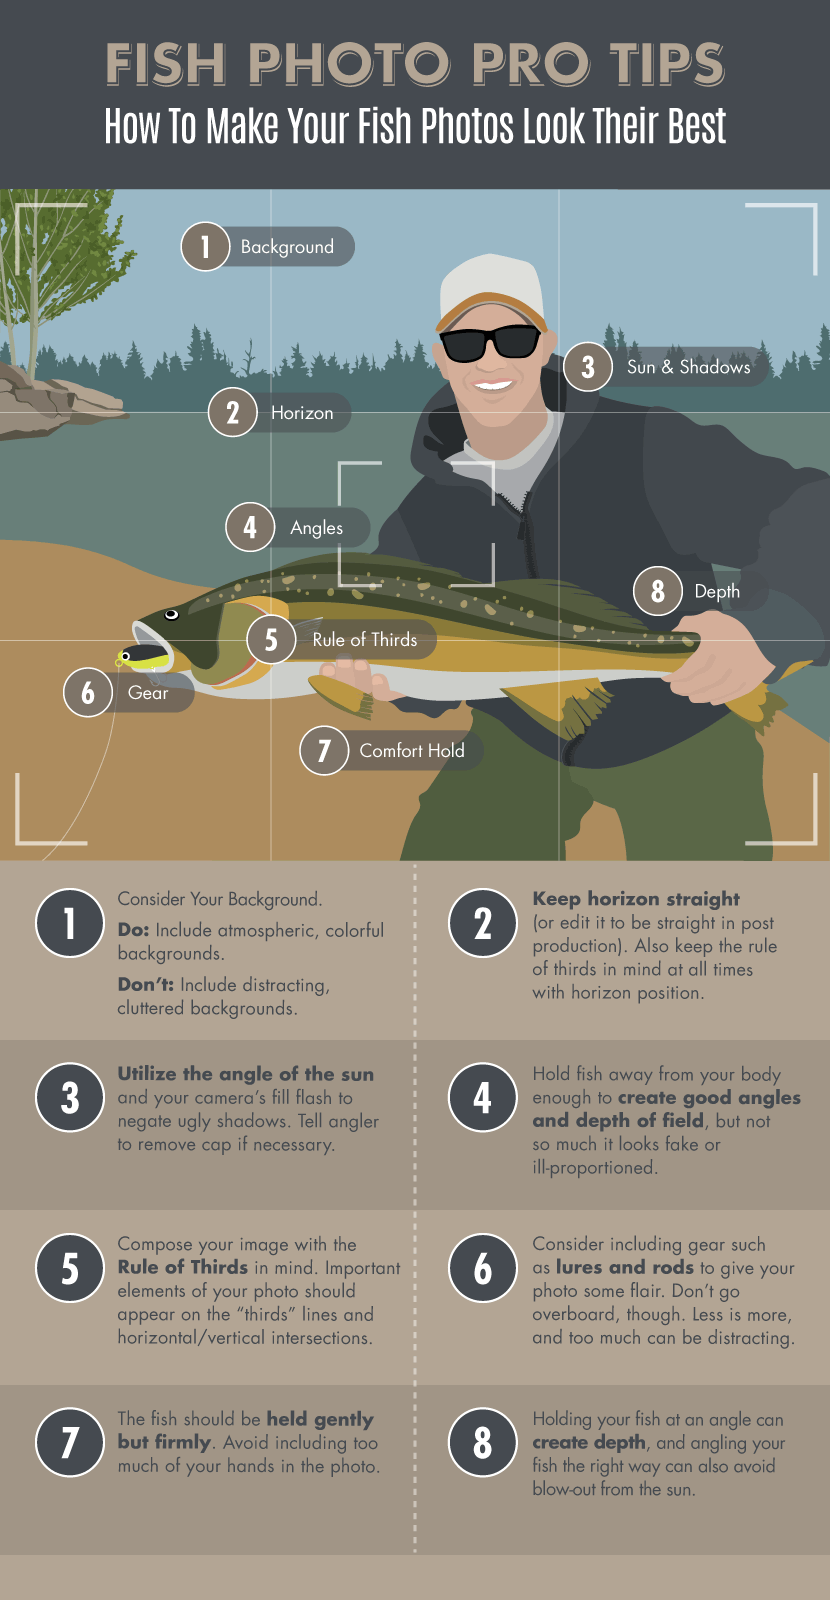
Now that you know how to handle your fish and set up a great photo, let’s talk about composition! We will start with the rule of thirds. All serious photographers are aware of the rule of thirds, and they all utilize it to some extent. Sometimes fishing photographers forget that the same rules apply to them! The rule of thirds states that you should compose your photos based on the idea that the frame is divided into thirds horizontally and vertically, thus creating nine boxes in each photo. Place points of interest near the intersecting horizontal and vertical “thirds” lines, and watch your results improve! Many modern cameras and even phones have a feature that shows you a grid to help with the rule of thirds. Subjects like the head of the fish, the smiling face of the angler, or even an outstretched net reaching for a trout are good examples of photograph elements that should be placed along the powerful “thirds” lines and intersections. The beauty of this rule is that it is applicable to cell phone photographers and to professionals who have spent thousands of dollars on gear. It will improve your results no matter what camera you use.
Use Angles
Experiment with angles. Try taking a photo from up high, down low, up close or far away. Get your subjects to be creative, too. Ask them to play around with the angle at which they hold their fish to create interesting depth-of-field effects (this can have the added benefit of reducing glare against the fish’s body). Get the angler to hold the fish high, low, or even underwater! The traditional “grip and grin” photo is overdone and boring, and the further you’re willing to go to utilize different angles and levels, the cooler your shots will look! Again, this rule applies to every level of fishing photographer, from those using cell phones to those using DSLRs!
About Shadows
Shadows are tricky. When we’re on the water fishing, we often don’t have the luxury of choosing the time of day at which the fish will bite or selecting the best angle from which to shoot due to limited deck space. Do your best to remove shadows by using the fill flash setting on your camera to boost a burst of light into the shadows on your subject’s face (but beware of overexposure, especially if your subject is holding a silvery fish). If you can, get their face at an angle to the sun that reduces the problem to begin with. If your subject is wearing a cap and sunglasses, have him or her take them off for the photo. They will often cast shadows, and it’s not neglecting sun safety to take them off for 30 seconds.
Background
Think about your background and peripheral surroundings when shooting photos. A beautiful scenic background is the perfect accompaniment to a great fishing photo, but distracting branches or fishing rods in rod holders can make a photo appear messy and cluttered. Use your discretion when deciding which background helps your photo, and if it looks cluttered, select a different backdrop or remove the distractions from the shot if possible. In addition, make an effort to keep your horizon straight. This can be difficult to achieve when you’re on a rolling sea; however, most image editing software will allow you to straighten your horizon in post-production. Even cell phone editing software often features this option.
Condensation
Take a moment to wipe your lens, even if you’re using a point-and-shoot camera or a cell phone. Water is everywhere when you’re fishing, and it’s amazing how easily it can get onto your camera’s lens and how often we don’t notice it until we get home and review our photos. Ensure that the lens hasn’t fogged up or gotten blurry as a result of condensation or attempts to clean it. Taking 30 seconds to take care of this will work wonders for your photos.
Avoid Lying with Your Arms
Holding your fish out from your body and towards the camera is an old technique to make a fish look big, engage the viewer, and create an interesting depth of field. Go too far with this, though, and you’ll be accused of trying to make a minnow look like a marlin! You shouldn’t reach so far toward the camera with your fish that you get tennis elbow. Think about how you hold your fish and how it affects the angle and depth of field, rather than simply how large it makes the fish look. The relative size of your fingers/hand compared to the fish will tell the real story to any seasoned angler. While we’re on the subject of hands, try and keep them out of the picture as much as possible! Cradle them under the fish’s belly rather than wrapping them around its flank in full view of the lens. This helps ensure that the fish stays healthy for the photo and/or release, and it helps a lot with the photo composition because the camera can focus on the fish rather than your hands!
As with angling, experience and repetition play a big part in how well you photograph your fish. Like all elements of photography, a desire to improve and learn will help you improve your compositions. Armed with a few basic principles, you’ll bring home much more from your next fishing trip than tall tales and a couple of fillets!
Tight lines!
Written by Jack Scrine
Sponsored